Make a Flying Dragon!
Make a flying paper dragon glider using folded cardstock, straw supports, and a balloon or launch ramp, then test flight stability and adjust for balance.
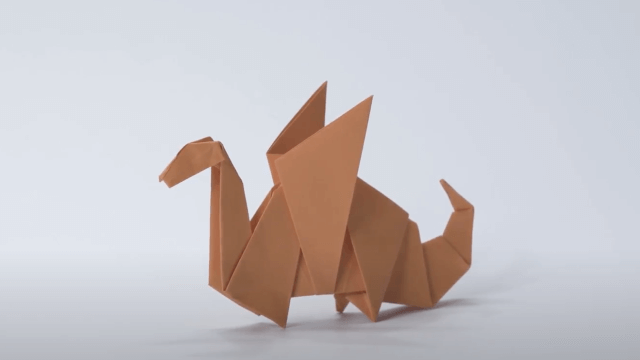
About this activity
Make a flying paper dragon glider using folded cardstock, straw supports, and a balloon or launch ramp, then test flight stability and adjust for balance.
What you need
Step by step
- 1
Step 1
Gather all your materials on a clear table so you can reach everything easily.
- 2
Step 2
Draw a dragon shape on the cardstock with big wings and a pointed nose so it will glide.
- 3
Step 3
Carefully cut out the dragon shape from the cardstock using scissors.
- 4
Step 4
Fold the dragon down the middle lengthwise to create a firm center body spine.
- 5
Step 5
Slide one drinking straw under each wing and tape them in place to stiffen the wings.
- 6
Step 6
Cut a small tail flap from leftover cardstock and tape it to the back of the dragon.
- 7
Step 7
Clip a paper clip to the nose of the dragon to add a little weight for balance.
- 8
Step 8
Set up your launch by either partly inflating a balloon or propping a book to make a ramp.
- 9
Step 9
Place the dragon on the balloon nozzle or on top of the ramp and release to fly.
- 10
Step 10
Watch the flight closely and notice if the dragon tilts dives or spins.
- 11
Step 11
Adjust balance by moving the paper clip slightly or trimming a tiny bit off a wing tip.
- 12
Step 12
Test the dragon again after each small change until the flight is smooth and steady.
- 13
Step 13
Decorate your dragon with coloring materials to give it fierce eyes and bright scales.
- 14
Step 14
Share your finished creation on DIY.org
Fun facts
How do I make a flying paper dragon glider?
Fold a piece of cardstock into a simple fuselage and cut wing and tail shapes so the dragon looks balanced. Tape or glue straw supports under the wings to act as spars. Attach a puffed-up balloon to the back or place the glider on a small launch ramp. Test fly, then trim wing edges or move straw supports to adjust lift and balance until it flies smoothly with a gentle glide and slight dihedral for stability.
What materials do I need to make a flying paper dragon?
You’ll need sturdy cardstock, a pair of scissors, tape or glue, drinking straws for internal supports, a balloon (or rubber band) for balloon-powered launch, paper clips or modeling clay for small weights, markers for decorating, and a simple ramp (cardboard) or a straw-launch setup. Optional: ruler, craft stick, and lightweight stickers. Keep small parts away from very young children and use scissors with supervision.
What ages is making a flying paper dragon suitable for?
This activity works well for ages 6 and up with adult supervision for cutting and balloon handling. Older kids (8–12+) can fold, reinforce, and fine-tune balance independently and learn basic aerodynamics. Younger children (3–5) can join by decorating pre-cut parts and helping attach straws and tape while an adult does the cutting and assembly. Adjust complexity to suit each child’s motor skills and safety needs.
What safety tips and fun variations can I try with the dragon glider?
Safety: supervise cutting, watch for balloon fragments, and test launches in open spaces away from faces and breakables. Use blunt scissors for little kids and keep small weights away from toddlers. Variations: change wing shapes, add twin tails, swap a balloon launch for a rubber-band catapult or a gentle ramp, or add clay nose weights to tune balance. These changes teach cause-and-effect and make flight testing a creative STEM experiment.
Watch & Learn
Need help?
What can we use instead of cardstock, drinking straws, or a paper clip if we don't have them?
Use cereal-box cardboard cut to the dragon shape and folded down the middle as the center spine instead of cardstock, a clean wooden skewer or rolled paper under each wing instead of drinking straws, and a small washer or a tightly folded piece of aluminum foil taped to the nose in place of a paper clip.
My dragon keeps tilting, diving, or spinning—what should I check and change?
Check that the straws are taped symmetrically under each wing for even stiffness, then adjust the paper clip a tiny bit along the nose or trim a small sliver off a wing tip as described in the instructions to correct balance and steady the flight.
How can I change this activity for different ages?
For younger kids, pre-draw and pre-cut the dragon and help tape the straws and tail flap (steps 2–6), while older children can design varied wing shapes, experiment with balloon versus ramp launches, and make fine balance adjustments themselves (steps 7–12).
What are some fun ways to improve or personalize our flying dragon?
Try varying wing span and straw placement to increase glide distance, add a movable tail flap for steering, decorate with paint and scales before cutting (steps 2 and 13), and record flight times or tricks to share on DIY.org.