Make a Flipbook
Create a small animated flipbook by drawing sequential images on paper, then bind and flip pages to watch your drawings come to life.
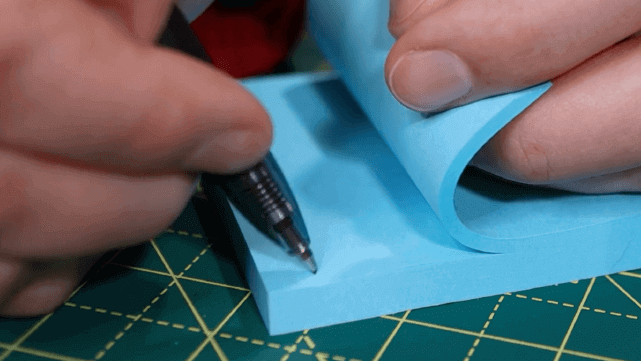
About this activity
Create a small animated flipbook by drawing sequential images on paper, then bind and flip pages to watch your drawings come to life.
What you need
Step by step
- 1
Step 1
Gather all the materials and place them on a clean flat table.
- 2
Step 2
Decide how many pages you want for your flipbook and stack that many sheets neatly with the edges lined up.
- 3
Step 3
Secure the short edge of the stack with a binder clip or staple to make a simple binding.
- 4
Step 4
Put the scrap cardboard under the stack to give a firm surface to draw on.
- 5
Step 5
Lightly sketch a simple starting pose on the top page using your pencil.
- 6
Step 6
Flip to the next page and draw the same character with a very small change in position or expression.
- 7
Step 7
Repeat flipping one page and making tiny changes on each page until every page has a frame of the animation.
- 8
Step 8
Trace over the pencil sketches with the fine-tip black pen to make the drawings clearer.
- 9
Step 9
Erase the pencil lines from each page after the ink is dry.
- 10
Step 10
Add color to the frames using your coloring materials if you like.
- 11
Step 11
Hold the bound edge with one hand and flip the pages quickly with your thumb to watch your animation come to life.
- 12
Step 12
Share your finished flipbook creation on DIY.org
Fun facts
How do you make a flipbook?
To make a flipbook, decide on a short, simple action (5–30 frames). Cut or gather identical-size pages (index cards, sticky notes). Lightly sketch the first and last frame, then draw incremental changes on each sheet, using a light source or tracing to keep alignment. Stack pages in order, secure the bound edge with a binder clip or staple, trim edges if needed. Hold the top edge and flip with your thumb to preview; refine drawings until motion looks smooth.
What materials do I need for a flipbook?
Basic materials: a stack of identical small papers (index cards, postcards, or a pad of sticky notes), pencils and eraser for rough sketches, fine-tip pens or markers for final lines, colored pencils for color, a ruler for edges, a binder clip or stapler to bind, scissors or paper trimmer if you need to cut, and a bright window or lightbox for tracing. Optional: corner punch, glue stick, or a smartphone camera to test animation.
What ages is this activity suitable for?
Flipbooks can be adapted for ages about 4 and up. Preschoolers (4–5) enjoy simple sticker or stamp sequences with adult help for cutting and binding. Elementary kids (6–10) can draw basic frame-to-frame motion independently. Tweens and teens can create detailed, longer animations and experiment with timing and perspective. Supervise younger children when using scissors, staplers, or small parts; adjust complexity to skill level to keep it fun and frustration-free.
What are the benefits of making flipbooks and are there safety tips?
Making flipbooks builds storytelling, sequencing, observation, and fine motor skills while teaching patience and visual timing. It encourages creativity and problem-solving as kids plan motion in small steps. For safety, supervise scissors, staplers, and small paper scraps around young children. Use non-toxic art supplies and keep sharp tools in adults' hands. To vary the activity, try color washes, stop-motion with photos, longer frame counts, or collaborative flipbooks where each child adds a
Watch & Learn
Need help?
What can we use if we don't have a binder clip/stapler or scrap cardboard?
If you don't have a binder clip or stapler, tightly wrap a rubber band or strong tape around the short edge to secure the stack (step 3), and use a cereal box panel or a thin book cover as the scrap cardboard under the stack (step 4).
My flipbook looks jumpy or the ink smudges—what should I check and do?
If the animation jumps or the ink smears, make sure the sheets are neatly stacked with edges aligned and firmly secured (steps 2–3), keep the scrap cardboard under the stack while drawing to hold positions steady (step 4), and let the fine-tip black pen fully dry before erasing (step 9).
How can I adapt this flipbook activity for different ages?
For younger children, use fewer sheets, make larger pose changes between pages, and allow crayons on thicker paper (steps 2, 6, 10), while older kids can use more pages with finer incremental changes and trace with a fine-tip black pen for cleaner frames (steps 2, 6, 8).
How can we personalize or extend the finished flipbook?
Personalize it by adding a decorated cardboard cover from the scrap cardboard, writing a title and credits on the first page, coloring frames with your coloring materials (steps 4, 10), and scanning the pages to create a GIF or video to share on DIY.org (step 12).