Make A Fab Feather Painting
Create a colorful feather painting using clean craft feathers, tempera paint, and paper. Experiment with textures, patterns, and color mixing to make art.


Step-by-step guide to make a fab feather painting
Feather Painting for Kids | Easy & Fun Art Activity for Children
Step 1
Cover your table with newspaper to protect it from paint.
Step 2
Place your paper on the protected workspace.
Step 3
Decide whether you want your paper tall or wide and turn it that way.
Step 4
Put small blobs of each paint color onto the paper plate or palette.
Step 5
Fill the cup with water for rinsing brushes and feathers.
Step 6
Place the paper towel next to your cup so you can dry feathers or wipe brushes.
Step 7
Choose one clean feather and gently dip its tip into one paint color.
Step 8
Drag the painted feather across the paper in one smooth motion to make a textured streak.
Step 9
Rinse the feather in the cup of water to clean off the paint.
Step 10
Dry the feather on the paper towel before using a new color.
Step 11
Choose a new feather and dip it into a different paint color.
Step 12
Make overlapping strokes with the new feather to mix colors and build patterns.
Step 13
Use a paintbrush or toothpick to add fine lines or dots for feather veins and extra detail.
Step 14
Let your painting dry completely on a flat surface for at least 30 minutes.
Step 15
Share your finished feather painting on DIY.org.
Help!?
What can we use instead of clean feathers or a paper plate if those are hard to find?
If you can't find clean feathers, use a cotton swab, small sponge, or a strip of cardboard to drag paint across the paper, and replace the paper plate/palette with a clean lid or saucer to hold the paint (Steps 4, 7–8).
My feather streaks are blotchy or dripping—how can I fix that?
If the feather makes blotchy streaks or drips during Step 8, blot excess paint on the paper towel (Step 6), dip only the feather tip, and drag it in one smooth motion to create a textured streak.
How can I adapt this feather painting for younger children or make it more challenging for older kids?
For toddlers, pre-load one feather with a single color and guide their hand for simple strokes (Steps 7–8), while older kids can layer overlapping colors, use a toothpick or paintbrush for fine veins (Step 13), and experiment with more colors on the palette (Step 4).
How can we extend or personalize the finished feather painting once it’s dry?
After the painting dries (Step 14), glue on a few real feathers, add metallic or glitter accents with the paintbrush (Step 13), then frame or photograph your artwork to share on DIY.org (Step 15).
Watch videos on how to make a fab feather painting
How to Make Painted Feathers | Sophie's World
4 Videos
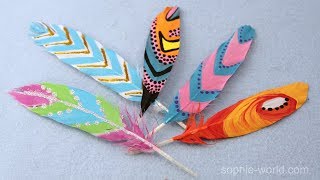
How to Make Painted Feathers | Sophie's World
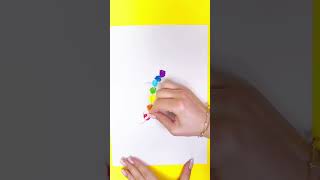
Stunning Oil Pastel Feather Art! 🎨✨
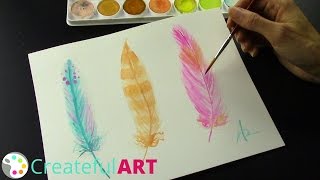
How To Paint Feathers - with watercolors
Watercolor easy and fun feather painting for beginners
Facts about painting and mixed-media crafts for kids
🪶 Feathers are made mostly of keratin — the same protein that makes up hair and fingernails.
🎨 Tempera paint (not to be confused with egg tempera) has been used for centuries and cleans up easily with soap and water.
🌈 Color theory tells us that mixing two primary colors (like blue + yellow) makes a bright secondary color (green) — great for feather gradients!
🖼️ Pressing a painted feather onto paper can create a unique monoprint texture that looks like a feather ghosting.
🐦 Plumage patterns help real birds camouflage, attract mates, or signal danger — you can invent your own feather superpowers in art!
How do I make a Fab Feather Painting?
What materials do I need for a Fab Feather Painting?
What ages is a Fab Feather Painting suitable for?
What are the benefits of making feather paintings with kids?
