Make a Donut Plushie with DIY Star MrsWoof
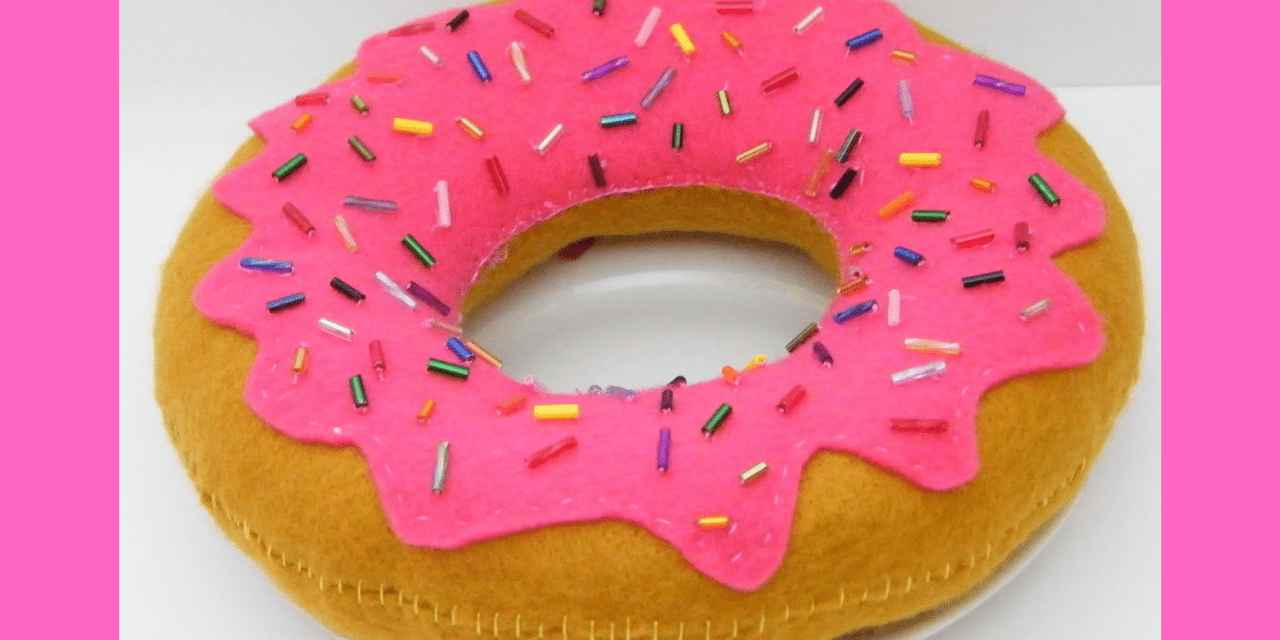
Sew and decorate a soft donut plushie featuring a star character, MrsWoof, using felt, stuffing, safe hand-stitching, and simple embellishments.
About this activity
Sew and decorate a soft donut plushie featuring a star character, MrsWoof, using felt, stuffing, safe hand-stitching, and simple embellishments.
What you need
Step by step
- 1
Step 1
Gather all your materials and set them on a clean flat table so you can find everything easily.
- 2
Step 2
Draw a donut shape with a hole and a cute star shape on the paper to make templates for the donut and MrsWoof.
- 3
Step 3
Cut out both paper templates so you can trace them onto the felt.
- 4
Step 4
Use the paper templates to trace two donut rounds onto the donut-colored felt and trace the frosting shape and the star onto their matching felt colors.
- 5
Step 5
Cut out all the felt shapes carefully with fabric scissors.
- 6
Step 6
Stitch a happy face onto the felt star using embroidery floss to make MrsWoof come alive.
- 7
Step 7
Sew the star onto the frosting piece with small neat stitches so MrsWoof stays in place.
- 8
Step 8
Decorate the frosting by drawing sprinkles with felt markers or gluing on tiny felt sprinkle shapes.
- 9
Step 9
Place the decorated frosting piece on top of one donut felt circle and line it up in the center.
- 10
Step 10
Sew the frosting securely to the donut front using small stitches around the frosting edge.
- 11
Step 11
Put the second donut felt circle on top and sew around the outer edge leaving a two inch gap for stuffing.
- 12
Step 12
Stuff your donut plushie gently with polyester stuffing until it feels soft and puffy.
- 13
Step 13
Sew the gap closed with neat stitches so no stuffing can come out.
- 14
Step 14
Trim any loose threads and give your donut plushie a final check to make sure MrsWoof looks perfect.
- 15
Step 15
Share your finished Donut Plushie featuring MrsWoof on DIY.org.
Fun facts
How do you make a Donut Plushie with DIY Star MrsWoof?
Trace two donut shapes and a smaller hole on felt, cut both pieces and the middle ring. Pin layers, thread a blunt embroidery or doll needle with strong floss, and use a running or blanket stitch to sew around the outer edge, leaving a 2-inch gap. Stuff with polyester fill, then close the gap with neat stitches. Cut a felt star for MrsWoof, sew or glue it on, add embroidered eyes, and attach small felt sprinkles or French-knot “sprinkles.”
What materials do I need to sew and decorate a Donut Plushie with MrsWoof?
You’ll need felt sheets in donut and star colors, embroidery floss, a blunt needle, polyester stuffing, scissors, pins, and a paper template. Optional items: tiny safety eyes or embroidery thread for features, fabric glue for quicker attachments, sequins or small felt pieces for sprinkles, a chopstick or stuffing tool, and a marker to trace shapes. For older kids, a sewing machine can speed up sewing (adult use only).
What ages is the DIY Donut Plushie with MrsWoof suitable for?
This activity suits ages 5–12 with adult supervision for cutting and stitching. Younger children (3–5) can join as a teamwork activity with an adult doing the needlework while the child decorates shapes and picks colors. Tweens and teens (10+) can sew most steps independently and try more detailed embroidery. Adjust complexity and safety (use blunt needles, pre-cut pieces) to match the child’s skill level.
What are some fun variations of the Donut Plushie project?
Try mini keychain donuts, a larger pillow-sized donut, or a donut with a zippered pocket. Change toppings: felt sprinkles, sequins, or embroidered designs; use glow-in-the-dark thread or metallic floss for accents. Make a reversible donut with a different face on each side, add a rattle or crinkle for sensory play, or create a MrsWoof collection with different expressions and colors. For a no-sew option, use strong fabric glue with adult supervision.
Watch & Learn
Need help?
What can I use instead of polyester stuffing or felt if I can't find them?
If you can't find polyester stuffing or felt, use clean pillow stuffing or cotton batting for the filling and substitute felt by tracing and cutting the donut and frosting shapes from fleece or an old soft T‑shirt before continuing with the tracing and cutting steps.
My seams are coming apart or stuffing leaks out—how do I fix that?
If stuffing leaks or seams come apart, reinforce the outer edge by sewing small neat stitches all the way around, close the two-inch gap carefully at the end with tight stitches and a secure knot so no stuffing can come out.
How can I adapt this project for younger or older kids?
For younger children have an adult pre-cut the felt donut and frosting and let them glue sprinkles and help stuff the donut, while older kids can trace, cut, embroider MrsWoof's face with embroidery floss and sew the two donut rounds together themselves using fabric scissors.
What are some ways to personalize or extend the donut plushie activity?
To personalize the plushie, glue on extra tiny felt sprinkle shapes to the frosting, embroider decorative patterns with different colored embroidery floss around the donut edge, or tuck a ribbon loop into the two-inch gap before stuffing and sewing it closed so you can hang your Donut Plushie.