Make a DIY Calender
Make a personalized DIY calendar using paper, markers, stickers, and simple math to plan months, learn dates, and decorate for daily organization.
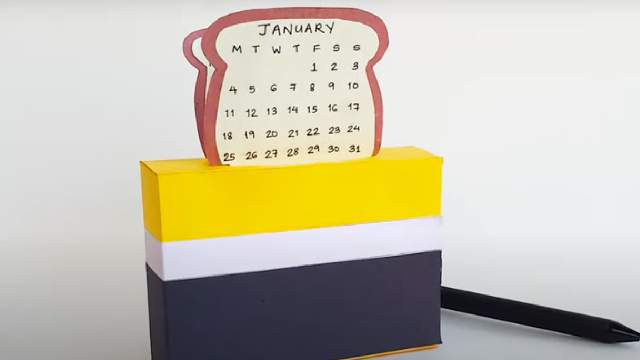
About this activity
Make a personalized DIY calendar using paper, markers, stickers, and simple math to plan months, learn dates, and decorate for daily organization.
What you need
Step by step
- 1
Step 1
Gather all the materials listed and place them on a clean workspace.
- 2
Step 2
Choose one month to make and pick a fun decoration theme for it.
- 3
Step 3
Use your ruler and pencil to draw a grid with 7 columns and 6 rows on the paper.
- 4
Step 4
Write the weekday names or abbreviations across the top row using a marker.
- 5
Step 5
Ask an adult or look at a calendar to find the weekday that the 1st of your chosen month falls on.
- 6
Step 6
Ask an adult or think about how many days are in that month (28 29 30 or 31).
- 7
Step 7
Starting at the correct weekday square, write the date numbers in order with your pencil until you reach the last day.
- 8
Step 8
Use stickers and markers to mark birthdays holidays and special events on the correct dates.
- 9
Step 9
Write the month name as a big colorful title at the top of your page.
- 10
Step 10
Draw a small notes box on the side for reminders to-do items or important tasks.
- 11
Step 11
Share your finished calendar on DIY.org
Fun facts
How do I help my child make a DIY calendar step by step?
Start by choosing a calendar size (monthly or weekly) and cut paper or use preprinted month templates. Draw a grid with a ruler, label weekdays, and write the month name. Together, count and fill in the dates using simple addition and subtraction to find the correct day placements. Let your child decorate with stickers, drawings, and color-coding for events. Hang it where the family can see and update it each month.
What materials do I need to make a personalized DIY calendar with my child?
Gather paper or light cardstock, markers or colored pens, ruler, pencil, scissors, stickers, glue or tape, and a hole punch plus string or binder rings to hang pages. Optional extras: printed month templates, adhesive calendar numbers, laminator or clear contact for durability, sticky notes for movable events, and a clipboard or frame to display the finished calendar.
What ages is a DIY calendar activity suitable for?
This activity suits a wide range: preschoolers (4–6) can decorate and place stickers while practicing counting; early elementary kids (7–9) can write dates, learn weekdays, and do simple math to fill months; older kids (10+) can design layouts, plan events, and track goals. Adjust complexity and supervision—for cutting and small items—based on the child’s fine motor skills and maturity.
What are the benefits, safety tips, and fun variations for a DIY calendar?
Making a calendar boosts number sense, planning, responsibility, and fine motor skills while encouraging creativity. Safety tips: supervise scissors and small stickers, use child-safe scissors, and avoid choking hazards. Variations include themed months, color-coded family schedules, pocket calendars for tickets or notes, magnetic fridge versions, or pairing with a simple digital reminder app to teach hybrid organization skills.
Watch & Learn
Need help?
What can we use instead of a ruler or stickers if we don't have them?
If you don't have a ruler, use the straight edge of a book or a printed ruler to draw the 7x6 grid, and if you don't have stickers, cut colored paper into small shapes to mark birthdays and holidays.
What should we do if the date numbers end up in the wrong weekday squares?
If numbers end up in the wrong weekday squares, follow step 5 to re-check which weekday the 1st falls on using a real calendar or an adult, erase the wrong pencil numbers, and rewrite starting in the correct weekday square so the dates match the month length.
How can we adapt this calendar activity for younger or older children?
For younger kids have an adult pre-draw the grid and weekday row and let them place number stickers and simple decorations, while older children can precisely measure with a ruler, add a notes box, color-code events, or decorate a themed title as in steps 3, 4, 9, and 10.
How can we improve or personalize the finished calendar before sharing?
Personalize your finished calendar by adding photos or themed drawings to match your decoration theme, color-coding birthdays and holidays with markers, and laminating the page or using clear contact paper so you can update events with dry-erase markers before sharing on DIY.org.