Learn Dot Painting
Make colorful dot paintings using cotton swabs, paint, and paper or stones. Practice patterns, fine motor skills, and color mixing while creating unique artworks.
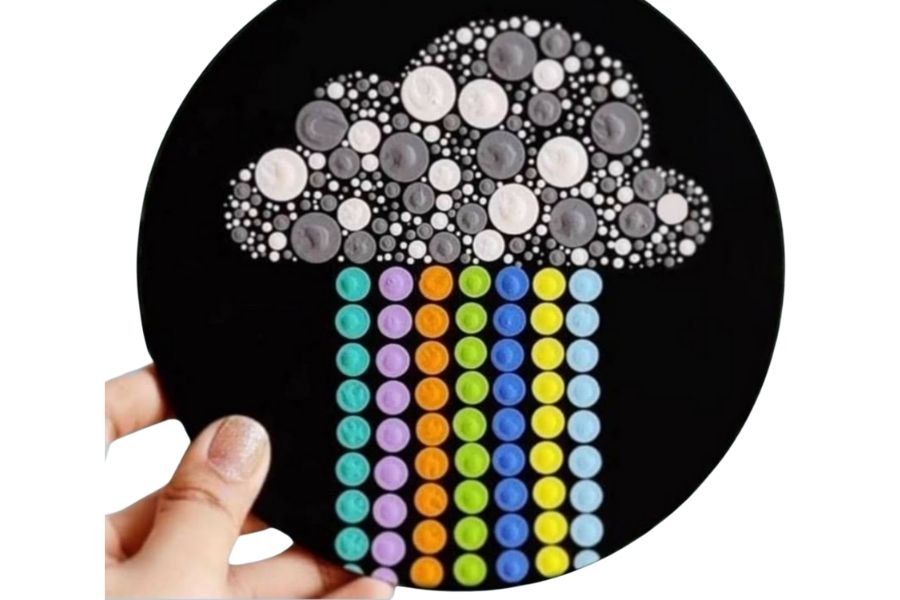
About this activity
Make colorful dot paintings using cotton swabs, paint, and paper or stones. Practice patterns, fine motor skills, and color mixing while creating unique artworks.
What you need
Step by step
- 1
Step 1
Clear a flat workspace and place a sheet of paper or your smooth stones in front of you.
- 2
Step 2
Squeeze small blobs of each paint color onto a plate or palette with space between them.
- 3
Step 3
Dip the tip of one cotton swab into a paint blob so the tip is covered but not dripping.
- 4
Step 4
Hold the cotton swab like a pencil and press it straight down onto your paper or stone to make a round dot.
- 5
Step 5
Lift the swab straight up to leave a neat circular dot and move to a new spot.
- 6
Step 6
Test making bigger or smaller dots on scrap paper by pressing harder or softer to learn how pressure changes size.
- 7
Step 7
Choose a simple pattern such as a row circle spiral or grid and start placing dots evenly to build the pattern.
- 8
Step 8
Wipe the swab on a paper towel or grab a new swab whenever you change colors.
- 9
Step 9
Mix two paint colors together on your plate to make a new shade and test it on scrap paper.
- 10
Step 10
Layer smaller dots on top of dried larger dots to add detail and colorful accents to your design.
- 11
Step 11
Let your finished painting dry completely before you touch or move it.
- 12
Step 12
Ask an adult to brush a thin coat of clear sealer over stones if you used them to protect the paint.
- 13
Step 13
Share a photo of your finished dot painting on DIY.org and tell everyone which colors and patterns you used.
Fun facts
How do you make dot paintings with cotton swabs?
Start by covering your work area and arranging paint in small containers. Dip a cotton swab into one color and press gently onto paper or a clean, dry stone to make round dots. Clean or switch swabs for different colors, and layer dots once dry to add depth. Encourage children to practice repeating patterns, try concentric circles, or form simple pictures. Let paintings dry completely, then seal stones with a clear varnish if desired.
What materials do I need for dot painting?
You’ll need cotton swabs, washable tempera or acrylic paints, and a painting surface like sturdy paper, cardstock, or smooth flat stones. Add a palette or egg carton for mixing, small cups of water, paper towels, and an apron or smock. Optional items: toothpicks for tiny dots, a pencil for sketching a design, and clear varnish to seal painted stones. Use washable paints for easy cleanup and kid-safe materials throughout.
What ages are dot painting activities suitable for?
Dot painting suits many ages: toddlers (around 3+) can enjoy big, simple dots with supervision, preschoolers build fine motor control and pattern recognition, and school-age kids can create detailed designs and color blending. Avoid small stones for children under 3 due to choking risks. Offer simpler tasks and larger tools for younger children, and more intricate challenges or smaller swabs for older kids to develop precision.
What are the benefits of dot painting for kids?
Dot painting supports fine motor development, hand-eye coordination, and concentration while encouraging creativity and color recognition. Repeating patterns boost early math skills and sequencing. It’s low-pressure and sensory-friendly, making it good for children who prefer predictable, controlled tasks. The activity also promotes patience and pride when pieces dry and are displayed. Group sessions encourage sharing, planning, and following simple steps together.
Watch & Learn
Need help?
If I don't have cotton swabs or a plate/palette, what can I use instead?
Use the eraser end of a pencil, the rounded tip of a toothpick, or the end of a small paintbrush to make dots and use a paper plate or an old yogurt lid as your palette while keeping paint blobs spaced apart as the instructions say.
My dots are smudging or not round — what should I do?
Press the cotton swab straight down and lift it straight up (don't drag), test harder/softer pressure on scrap paper to control size, wipe or grab a new swab when changing colors, and let larger dots dry before layering to avoid smudging.
How can I adapt this activity for toddlers versus older kids?
For toddlers use larger washable tempera paint, bigger tools like a sponge-tip or marker cap and a protected flat workspace for simple rows or grids, while older kids can use toothpicks for tiny dots, mix colors on the palette for new shades, and make intricate spirals or mandalas.
How can we personalize or extend the finished dot painting?
Layer smaller dots on dried larger dots for details, add metallic or glow-in-the-dark paints to your palette, ask an adult to brush a thin coat of clear sealer over painted stones for protection, or glue magnets to stone backs and share a photo on DIY.org.