Illustrate a picture book
Create and illustrate a three to six page picture book by planning a simple story, sketching scenes, adding color, and writing short captions.
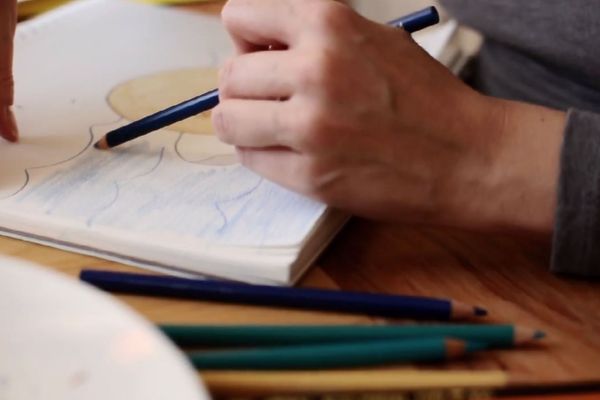
About this activity
Create and illustrate a three to six page picture book by planning a simple story, sketching scenes, adding color, and writing short captions.
What you need
Step by step
- 1
Step 1
Gather the materials listed above.
- 2
Step 2
Pick how many pages your book will have between three and six.
- 3
Step 3
Think of a very simple story idea with a beginning a middle and an end.
- 4
Step 4
Choose a main character and one setting for your story.
- 5
Step 5
On scrap paper write one short sentence for each page to plan what will happen there.
- 6
Step 6
Fold several sheets of paper in half and nest them together to make your book pages.
- 7
Step 7
Draw tiny thumbnail sketches on scrap paper showing what each page will look like.
- 8
Step 8
Lightly pencil a larger sketch of each thumbnail onto the matching page in your book.
- 9
Step 9
Add details to each pencil sketch like faces props and background shapes.
- 10
Step 10
Write a short caption under each picture on its page using neat handwriting.
- 11
Step 11
Color each illustration using your coloring materials.
- 12
Step 12
Create a cover by drawing a title and a front picture on the first page.
- 13
Step 13
Staple the folded spine or punch holes and tie string to secure the pages.
- 14
Step 14
Share your finished picture book on DIY.org.
Fun facts
How do I create and illustrate a three- to six-page picture book?
Start by planning a simple story with a clear beginning, middle, and end—one sentence per page. Make small thumbnail sketches to plan compositions and pacing. On each page, sketch scenes lightly in pencil, then refine characters and backgrounds. Add color using crayons, watercolor, or markers; let layers dry between steps. Write short captions or dialogue in large, legible handwriting. Finally, assemble pages (staple, ribbon, or fold) and read the book aloud to celebrate.
What materials do I need to illustrate a picture book with my child?
You’ll need paper or blank index cards (thick paper works best), pencils and erasers, colored pencils, markers or watercolor paints, paintbrushes, and a palette. Add a ruler, pencil sharpener, glue stick, scissors, and a stapler or ribbon for binding. Sticky notes or a notebook for thumbnails helps planning. For younger kids choose washable, non-toxic supplies and an apron; older children may use a tablet and stylus for digital illustration.
What ages is creating a short picture book suitable for?
This activity suits ages about 4–12 with adjustments: preschoolers (4–6) can make simple picture books with adult help for cutting, writing, and sequencing. Ages 7–9 can plan, sketch, and write short captions more independently. Ages 10–12 can add more detailed art, lettering, and basic design. Tailor complexity—use thicker tools and templates for younger children, and encourage independent editing and creative choices for older kids.
What are the benefits of making a three- to six-page picture book with my child?
Making a short picture book builds storytelling, sequencing, and vocabulary while strengthening fine motor skills through drawing and cutting. It encourages planning, creativity, and confidence as children complete a finished book. Working together promotes communication and listening. It’s also a gentle way for kids to express emotions and practice handwriting. Displaying the finished book reinforces pride in accomplishment and motivates further creative projects.
Watch & Learn
Need help?
What can we use if we don't have staples, string, or fancy coloring supplies listed in the materials?
If you don't have a stapler or string to 'secure the pages' you can glue the folded spine with white glue or tape it with clear or washi tape, and for 'color each illustration' use crayons, colored pencils, or watered-down poster paints while a piece of cereal-box cardboard makes a sturdy cover substitute.
My nested pages shift and my pencil drawings smudge when I color—how can I fix that?
To keep pages from shifting, press strong creases with a ruler or bone folder before you 'nest them together' and secure the spine tightly with staples or tied string, and to avoid smudges make 'light pencil' sketches, let any wet coloring dry fully, and place a scrap sheet under your hand while you 'color each illustration'.
How can I adapt this picture-book activity for different ages?
For preschoolers limit the book to three big pages with stickers and an adult writing the short caption, for early elementary have them follow the 'one short sentence per page' plan and draw simple thumbnails, and for older kids expand to six pages with detailed thumbnails, refined pencil sketches, and more complex captions before 'sharing on DIY.org'.
How can we extend or personalize the finished picture book beyond the basic instructions?
Make the 'Create a cover' step special by adding collage, fabric, or laminated artwork, include simple pop-up or flap elements when you 'add details,' bind with decorative tape instead of staples, and scan or record a narration to upload when you 'share your finished picture book on DIY.org.'