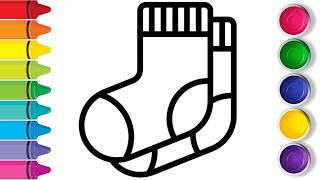
How to draw socks - a free socks drawing guide
Draw and color a pair of socks, practicing simple shapes, proportions, and fun patterns. Finish by adding shading and decorative details.


Drawing Apps
Get inspired with these


Instructions
How to Draw Socks Step by Step for Kids | Socks Easy Drawing | Draw Socks for Kids #socks #drawing
Step 1
Draw two long rounded rectangles to mark the bodies of the socks.
Step 2
At the bottom of each rectangle draw a sideways bean shape to mark the foot and toe area.
Step 3
Add a cuff at the top of each sock by drawing two short parallel horizontal lines.
Step 4
Mark the heel on the lower back edge of each sock with a small curved patch.
Step 5
Draw a seam line across the front of each sock to show the toe cap.
Step 6
Carefully trace a smooth outer contour for each sock following your guides to make natural sock shapes.
Step 7
Erase the inside guide lines so only the clean sock outlines remain.
Step 8
Lightly sketch a simple pattern on each sock using stripes dots or zigzags.
Step 9
Darken the final pattern lines and the main sock outlines with firmer pencil strokes.
Step 10
Add short curved lines near the ankle and toe to show fabric folds and texture.
Step 11
Choose a light source and shade the opposite side of each sock lightly to create shadows.
Step 12
Smooth the shaded areas with your blending tool or finger to make soft shadows.
Step 13
Create highlights by gently erasing thin areas where light would hit the socks.
Step 14
Colour the socks using your colouring materials to finish the patterns and tones.
Step 15
Share your finished sock drawing on DIY.org
Help!?
I don't have a blending stump or special eraser—what can I use instead?
If you don't have a blending tool or kneaded eraser, use a cotton swab, a small piece of tissue, or your finger to 'Smooth the shaded areas with your blending tool or finger' and a clean soft eraser to 'Create highlights by gently erasing thin areas.'
My outer contour looks jagged when I trace over the guides; how can I fix it?
If the 'Carefully trace a smooth outer contour' step is wobbly, retrace using light, short strokes that follow your rectangle and bean guides, then 'Erase the inside guide lines' and 'Darken the final pattern lines' with one confident pass.
How can I adapt the instructions for younger or older kids?
For younger children, simplify by only doing 'Draw two long rounded rectangles,' 'Add a cuff,' and basic patterns, while older kids can add 'short curved lines near the ankle and toe,' detailed shading ('Choose a light source and shade'), and more complex patterns or texture.
How can we make the sock drawings more creative or keep extending the project?
To enhance the activity, turn the 'Lightly sketch a simple pattern' into knit stitches or a logo on the cuff, experiment with colour blending when you 'Colour the socks using your colouring materials,' or scan and edit the 'finished sock drawing' digitally before sharing.
Related videos
How to Draw a Cute Sock | Easy Step-by-Step Tutorial | Kids Drawing and Coloring
4 Videos

How to Draw a Cute Sock | Easy Step-by-Step Tutorial | Kids Drawing and Coloring
How to draw a Socks, step by step tutorial!
How to Draw a Cute Sock | Easy Step-by-Step Tutorial #artforkids #drawing #stepbystepdrawing #art
How to Draw Socks from Bluey 🐶✨ | EASY Step-by-Step Drawings for Kids!
Fun Facts
🧦 The oldest known socks (from about 300–500 AD) were found in Egypt and made with a single-needle technique called nålbinding.
✍️ Artists often block in drawings with simple shapes (ovals, rectangles, lines) first to keep proportions accurate.
🧶 Sock cuffs commonly use ribbing (alternating knit-and-purl) to help socks stay up — that ribbed texture is fun to draw.
🎨 Chiaroscuro is an art technique using strong light and dark contrast to make flat shapes look three-dimensional — perfect for shading socks.
📐 Using guidelines (like dividing a sock into thirds) helps keep stripes, patterns, and shading aligned around curves and toes.
How do I teach my child to draw a pair of socks step by step with patterns and shading?
What materials do I need to draw socks with patterns and shading?
What ages is this sock-drawing activity suitable for?
What are the benefits of having children draw patterned socks with shading?
