How to draw a seashell - a free seashell drawing guide
Draw a realistic spiral seashell step-by-step using simple shapes and shading. Practice proportion, symmetry, and texture to improve observation and drawing skills.

Drawing Apps
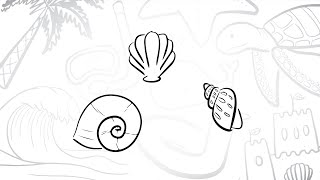
Photos of spiral seashell drawing examples


Step-by-step guide to draw a realistic spiral seashell
How To Draw A Seashell 🐚 Very Easy For Kids Drawing & Coloring Tutorial
Step 1
Lightly draw a large oval to mark the overall shape and size of your seashell.
Step 2
Put a small dot near one end of the oval to mark the shell’s apex.
Step 3
From the apex draw a light spiral guide that winds outward three to five turns with each loop a bit wider than the last.
Step 4
Draw a second spiral line parallel to the guide to give the whorls thickness.
Step 5
Smooth and connect the outermost spiral to the oval to form the shell’s outer contour.
Step 6
Draw the shell aperture as a curved opening along the outer edge where the shell would sit on the surface.
Step 7
Add short curved ridge lines that follow the spiral direction across each whorl.
Step 8
Erase the extra sketch lines and dots used as guides so only the shell outline and ridge lines remain.
Step 9
Lightly mark the direction of your light source with a small arrow outside the drawing.
Step 10
Shade the side of the shell opposite the light source using gentle pencil strokes that follow the shell’s curves.
Step 11
Blend the shaded areas softly with your blending tool to smooth transitions.
Step 12
Darken the deepest crevices and the base of each ridge to create more depth.
Step 13
Erase a thin curved highlight on the light-facing side to show a shiny surface.
Step 14
Add small texture marks like tiny lines or dots along the curves to suggest shell pattern and imperfections.
Step 15
Take a photo or scan your finished seashell drawing and share your creation on DIY.org
Help!?
If I don't have a blending stump or tortillon, what can I use instead?
Use a clean tissue, cotton swab, or your fingertip to softly blend the shaded pencil strokes when following the shell's curves during the 'Blend the shaded areas' step.
My spiral guide looks uneven and the whorls don't line up—how can I fix that?
Lightly redraw the spiral guide starting from the small dot apex using equally spaced pencil dots as checkpoints or a compass to keep each loop a bit wider, then erase and redraw the parallel second spiral line for consistent whorl thickness.
How can I adapt this seashell drawing for younger children or older kids?
For younger kids, simplify by drawing only two or three spiral turns and pre-sketching the large oval and apex for them to trace, while older kids can add more whorls, detailed ridge textures, deeper shading, and try colored pencils or watercolor after erasing the guide lines.
What are some ways to personalize or extend the finished seashell drawing?
Personalize it by adding color with watercolor or colored pencils, creating a sandy background with textured shading, drawing a group of shells in different sizes to form a composition, or scanning and sharing on DIY.org as suggested.
Watch videos on how to draw a realistic spiral seashell
How To Draw A Seashell
4 Videos

How To Draw A Seashell
🐚 How To Draw Some Simple Seashells | Step-by-Step Lesson ✏️
How To Draw A Seashell | Easy Drawing Step By Step 😊

Seashell Drawing Tutorial 🌊🐚 - Fun Ocean Art For Kids #shorts #howtodraw #drawing #seashellart
Facts about drawing and shading techniques
🐚 Seashells are hard external coverings created by mollusks — they’re like tiny portable homes!
🌀 Many shells grow in a logarithmic spiral, so the shell keeps the same shape as it gets bigger.
🐙 The chambered nautilus lives in a coiled shell and adds new chambers as it grows to control buoyancy.
🎨 Shell colors and patterns come from pigments laid down as the animal grows — no two patterns are exactly the same.
📏 Some marine shells, like Syrinx aruanus, can grow nearly a meter long — bigger than many backpacks!
How do I draw a realistic spiral seashell step by step?
What materials do I need to draw a realistic seashell?
What ages is drawing a spiral seashell suitable for?
What are the benefits, safety tips, and variations for this seashell drawing activity?
