How to draw a leopard - a free leopard drawing guide
Learn to draw a realistic leopard step-by-step using simple shapes, add spots and shading, and practice proportions and observation skills.


Drawing Apps
Photos of realistic leopard drawings


Step-by-step guide to draw a realistic leopard
How To Draw A Monkey - Preschool
Step 1
Find a comfortable spot and place your paper and pencil in front of you.
Step 2
Lightly sketch a small oval for the head and a larger oval for the body.
Step 3
Draw a short curved line to join the head and body as the neck.
Step 4
Add a vertical center line and a horizontal eye line across the head to guide proportions.
Step 5
Mark two small circles on the eye line where the eyes will sit.
Step 6
Draw a small rounded triangle for the nose below the eye line.
Step 7
Add a simple mouth line from the nose and a soft chin shape.
Step 8
Sketch two rounded triangle ears on top of the head.
Step 9
Draw four leg shapes using long rounded rectangles and add a long curved line for the tail.
Step 10
Smooth the outside shapes to form the leopard outline and adjust curves to look natural.
Step 11
Erase extra construction lines that you no longer need.
Step 12
Draw spots across the body using a mix of open rosettes and solid spots.
Step 13
Add short directional pencil strokes around the face and body to suggest fur texture.
Step 14
Shade darker areas with light pencil strokes to show volume and form.
Step 15
Share your finished leopard drawing on DIY.org.
Help!?
What can we use instead of a regular pencil and plain paper if we don't have them?
Use a mechanical pencil or a softer graphite (2B) for the light sketching steps and substitute heavyweight printer paper, a cereal-box-backed scrap, or a sketchbook page so the erasing and shading hold up.
My leopard looks lopsided after drawing the head and body ovals—how can I fix it?
Keep those construction ovals very light, re-check the vertical center and horizontal eye guide lines, then gently erase and nudge the head or body until the short curved neck line (step 3) connects them naturally.
How can I adapt this drawing activity for different ages?
For toddlers simplify to two big ovals and bold spots with crayons, for younger kids follow the basic ovals, eyes, nose and tail steps with guided tracing, and for older kids add detailed open rosettes, directional fur strokes and careful shading to build form before sharing on DIY.org.
What are easy ways to personalize or extend the leopard drawing once it's finished?
Try adding colored pencils or watercolor washes for a savanna background, invent unique spot patterns or facial expressions, or turn the drawing into a character by changing ear shapes and photographing it to upload to DIY.org.
Watch videos on how to draw a realistic leopard
How To Draw A Tiger - Preschool
4 Videos
How To Draw A Tiger - Preschool
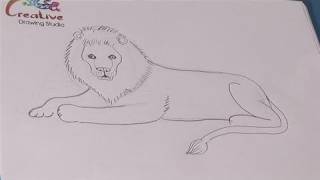
How To Learn To Draw A Lion

How To Draw A Christmas Tiger - Preschool
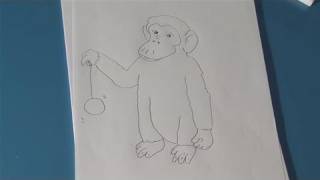
How To Sketch A Monkey
Facts about drawing animals for kids
🐆 Leopard spots, called rosettes, are unique to each animal—like fingerprints!
🎨 Rosettes are ring-shaped marks with lighter centers, so when drawing avoid making solid circles.
🖊️ A leopard's tail is long and helps with balance—drawing a curved tail adds realism and motion.
🌳 Leopards are expert climbers and often rest on branches—adding a tree helps practice perspective and foreshortening.
🐾 Some leopards are melanistic (appear black); their spots still show up in the light, so shading can reveal hidden patterns.
How do I teach a child to draw a realistic leopard step-by-step?
What materials do I need for drawing a realistic leopard?
What ages is this activity suitable for?
What are the benefits of teaching kids to draw a leopard?
