How to Draw a Chihuahua
Draw a chihuahua step by step using simple shapes, outlines, and shading techniques. Practice proportions, facial expression, and coloring to finish a portrait.
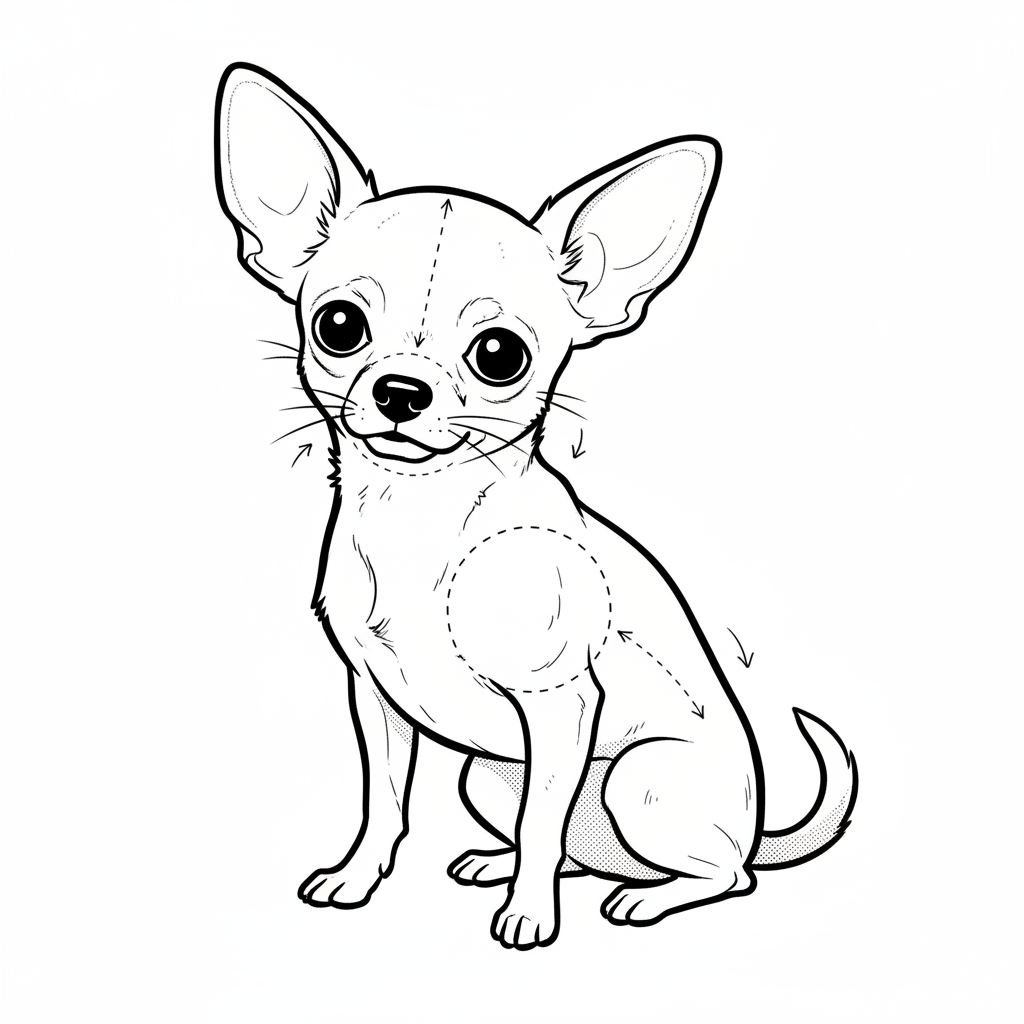
About this tutorial
Draw a chihuahua step by step using simple shapes, outlines, and shading techniques. Practice proportions, facial expression, and coloring to finish a portrait.
What you need
Instructions
- 1
Step 1
Gather your materials and sit at a clean flat workspace.
- 2
Step 2
Lightly draw a circle for the chihuahua’s head and a small oval beneath it for the body.
- 3
Step 3
Draw a vertical line and a horizontal line crossing the head to mark where the face features will go.
- 4
Step 4
Add two large triangular ears on top of the head, tilting them slightly outward.
- 5
Step 5
Draw almond-shaped eyes on the horizontal guideline and include small pupils.
- 6
Step 6
Sketch a small rounded triangle at the bottom of the vertical guideline for the nose.
- 7
Step 7
Draw a short curved line under the nose to make the mouth.
- 8
Step 8
Draw two short neck lines to connect the head to the body.
- 9
Step 9
Sketch two slender front legs beneath the front of the body using long ovals.
- 10
Step 10
Sketch two hind legs and a curved tail at the back of the body.
- 11
Step 11
Trace a smooth outline over your sketch to form the chihuahua’s final silhouette.
- 12
Step 12
Erase the extra construction lines and stray pencil marks.
- 13
Step 13
Add short fur strokes and light shading under the chin belly and inside the ears using your pencil and tissue to blend.
- 14
Step 14
Color your chihuahua portrait with your coloring materials and add small highlights with your eraser.
- 15
Step 15
Share your finished chihuahua portrait on DIY.org.
Get inspired
Fun facts
How do I draw a chihuahua step by step?
Start with simple shapes: draw a circle for the head and a small oval for the snout. Add large triangular ears, two guideline lines for eye placement, and a tiny oval for the nose. Sketch a compact oval body and short legs. Refine outlines, erase construction lines, then add facial details: big expressive eyes, wrinkles, and a smiling mouth. Shade with short strokes to suggest fur, deepen shadows under the chin and behind ears, then color and add highlights to finish.
What materials do I need to draw a chihuahua portrait?
You'll need plain drawing paper or sketchbook, an HB pencil for light construction lines and a 2B (or 4B) pencil for darker outlines and shading. Bring a kneaded or plastic eraser, a sharpener, and optional blending stump or cotton swab for soft shading. For color, use colored pencils, watercolor, or markers. A reference photo of a chihuahua and a small ruler for proportions are helpful but not required.
What ages is drawing a chihuahua suitable for?
This step-by-step chihuahua portrait works well for ages about 5 and up. Younger kids (5–7) benefit from simplified shapes and adult guidance. Ages 8–12 can practice proportions, facial expressions, and basic shading with some independence. Teens and adults can focus on more advanced fur texture, shading, and coloring techniques. Adjust complexity, tools, and time to match each child’s fine-motor skills and attention span.
What are the benefits and variations of drawing chihuahuas?
Drawing chihuahuas improves fine motor skills, observation, proportion sense, patience, and creative expression. It builds confidence when kids complete a portrait. Safety is minimal — supervise sharp tools and avoid toxic art supplies. Variations include cartoon-style chihuahuas, full-body poses, puppy vs. adult proportions, using watercolor or pastels, or creating a comic strip with the dog as a character. Try timing sketches or changing expressions for extra practice and fun.
Watch & Learn
Need help?
I don't have a tissue or a kneaded eraser — what can I use instead for blending and highlights?
Use a cotton swab or a folded soft cloth to blend the light shading under the chin, belly and inside the ears, and lift small highlights with the corner of a regular white eraser or a tightly rolled piece of tissue.
My chihuahua's ears or facial features look lopsided — how can I fix proportions before tracing the final silhouette?
Double-check and lightly redraw the vertical and horizontal guidelines on the head to realign the almond-shaped eyes, nose triangle and tilted triangular ears, then adjust ear angles and eye placement before tracing the smooth outline.
How can I adapt this activity for younger children or older kids who want more challenge?
For younger kids simplify to big shapes only (one circle head and one oval body) and use thick markers for bold outlines, while older kids can refine slender front legs, add more short fur strokes, detailed pupils, and blended shading with a tissue.
What are good ways to personalize or extend the chihuahua portrait after finishing the basic steps?
Add a patterned collar, draw a background like a couch or park, try different coloring materials such as colored pencils or watercolors for texture, or make a series of chihuahuas with varied ear tilts and tail curves and share them on DIY.org.