#GroomYourRoom Day 6 : Magic
Make a magic tidy up trick by creating a labeled organizer box and practice making room clutter disappear using simple folding and hiding techniques.


Step-by-step guide to #GroomYourRoom Day 6: Magic (Make a magic tidy-up trick)
Photosynthesis 🌷 | What is photosynthesis? | Step-by-step process
Step 1
Put all your materials on a clear spot on a table.
Step 2
Place the shoebox on the table with the opening facing up.
Step 3
Fold one sheet of plain paper in half to make a pocket shape.
Step 4
Tape the two open edges of the folded paper so it becomes a pocket with an open top.
Step 5
Make three more identical paper pockets so you have four pockets in total.
Step 6
Tape the pockets inside the box side by side so they are secure and easy to reach.
Step 7
Write a label for each pocket on a sticky note using your colouring materials.
Step 8
Stick each label onto the front of its matching pocket.
Step 9
Decorate the outside of the box with stickers or drawings to make it look magical.
Step 10
Place small clutter items into their matching labeled pockets.
Step 11
Fold a soft small item flat and slide it into a pocket so it disappears from view.
Step 12
Quickly close the lid or fold a flap over the pockets to hide everything in one magic move.
Step 13
Practice the quick hide-and-reveal three times until you can do it smoothly.
Step 14
Share a photo or video of your magic tidy-up organizer on DIY.org.
Help!?
What can I use if I don't have a shoebox, plain paper, tape, or sticky notes?
Use a cereal box or any small cardboard container with the opening facing up instead of a shoebox, cut notebook or cardstock pages to fold into pockets in place of plain paper, secure the folded pockets with a stapler or glue stick if you don't have tape, and make labels from scrap paper or masking tape instead of sticky notes while colouring them with crayons or markers.
My paper pockets keep coming loose or the lid won't close—how do I fix that?
Reinforce the two open edges after you fold each sheet by adding extra tape or a glue line, trim pocket widths so all four sit side by side comfortably inside the box, and tape pockets a little lower on the inside walls so the lid or flap can close over them to hide everything in one magic move.
How can I change this activity for different age groups?
For toddlers (3–5) have an adult pre-fold and tape two big pockets and use picture labels, for early elementary kids (5–8) let them fold, tape, and write simple words on sticky notes with supervision, and for older kids (9+) challenge them to make more pockets, colour-code labels, and practice the quick hide-and-reveal three times to improve speed.
How can we make the organizer more magical or advanced?
Decorate the outside of the box with stickers or drawings, add a secret flap, Velcro strip, or ribbon tie for a smoother quick hide-and-reveal, create clear windows or removable pockets for each category, and finish by sharing a photo or video of your magic tidy-up organizer on DIY.org.
Watch videos on how to #GroomYourRoom Day 6: Magic (make a magic tidy-up trick)
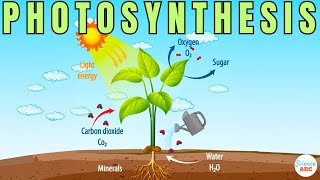
Photosynthesis
4 Videos
Photosynthesis

Photosynthesis: Crash Course Biology #8
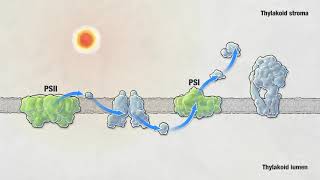
Photosynthesis | HHMI BioInteractive Video
Photosynthesis: The Biochemistry Behind How Plants Make Their Food
Facts about room organization for kids
🧩 Origami means "folding paper" in Japanese — you can make a useful box from a single sheet with no glue!
🧹 Marie Kondo's KonMari method asks you to keep only things that 'spark joy' — a fun question kids can use to sort toys.
🏷️ Labels with words or pictures help pre-readers put things back in the right box much faster.
🪄 Simple folding and tucking (like folding clothes into neat rectangles) can make a messy pile 'disappear' in seconds — tidy-up magic!
♻️ A cereal box or shoebox makes a great organizer — upcycling boxes saves money and reduces waste.
How do I set up the #GroomYourRoom Day 6 magic tidy-up trick?
What materials do I need to make a labeled organizer box for the magic tidy-up?
What ages is the #GroomYourRoom Day 6 magic tidy-up activity suitable for?
What are the benefits and safety tips for practicing the magic tidy-up trick?
