Drawing HeiHei
Draw HeiHei from Moana using simple shapes, pencil sketching, inking, and coloring. Practice proportions, expressions, and using bright colors for feathers.

Drawing Apps
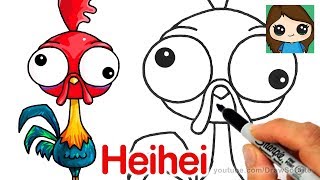
Step-by-step guide to draw HeiHei from Moana
Step 1
Place your reference picture of HeiHei where you can see it easily.
Step 2
Lightly draw a large oval for HeiHei’s body.
Step 3
Lightly draw a smaller circle overlapping the top of the oval for HeiHei’s head.
Step 4
Sketch a long thin triangle for the beak coming out of the head.
Step 5
Draw two big round eyes and add small pupils inside them.
Step 6
Add a thin S-shaped neck connecting the head and body.
Step 7
Draw two thin legs with three pointy toes on each foot under the body.
Step 8
Add zigzag tufts on the head and a few long curved tail feathers.
Step 9
Change the eye shapes or add slanted eyebrow lines to give HeiHei a funny expression.
Step 10
Erase extra guidelines so only the neat sketch lines remain.
Step 11
Ink over your final lines with the black marker.
Step 12
Let the ink dry completely.
Step 13
Gently erase any remaining pencil marks.
Step 14
Color HeiHei using bright colors for the feathers a yellow or orange beak and pink or red legs.
Step 15
Share your finished HeiHei drawing on DIY.org.
Help!?
What can I use if I don't have a black marker or a printed reference picture?
If you don't have a black marker for the 'Ink over your final lines' step, use a fine-tip permanent pen or dark gel pen, and if you can't print the reference picture, display it on a tablet or phone where you can see it easily.
My sketch looks messy or the head and body don't line up—what should I do before inking?
Keep the initial large oval and smaller overlapping circle very light so you can adjust the 'thin S-shaped neck', beak, and eye placement, then use the 'Erase extra guidelines' step to clean proportions before you 'Ink over your final lines'.
How can I adapt this activity for younger or older children?
For younger kids, pre-draw the large oval and smaller circle for them to trace and let them 'Color HeiHei' with crayons, while older kids can add feather texture, shading, and extra ink details after 'Let the ink dry completely'.
How can we extend or personalize the drawing once HeiHei is finished?
Personalize HeiHei by changing the eye shapes or adding slanted eyebrow lines for a funny expression, create a bright beach background with colored pencils or watercolor after erasing pencil marks, and then photograph it to 'Share your finished HeiHei drawing on DIY.org'.
Watch videos on how to draw HeiHei from Moana
How To Draw Hei Hei | Moana 2
4 Videos
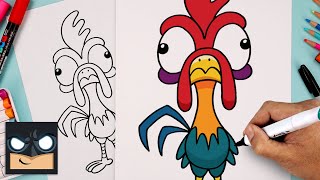
How To Draw Hei Hei | Moana 2

How To Draw Hei Hei from Moana | Disney | Cute Drawing Tutorial
How to Draw Heihei Easy | Disney Moana Chicken

How to Draw Hei Hei from Moana - Easy Drawing for Kids #lidoartworks
Facts about character drawing for kids
🐓 Hei Hei is the clumsy rooster sidekick in Disney's Moana, loved for his goofy expressions and comic timing.
✏️ Animators and artists often start character drawings with simple shapes — circles, ovals, and triangles — to get proportions right.
🎨 Bright, contrasting feather colors (like reds, blues, and yellows) make cartoon birds pop and feel playful on-screen.
🐦 Real bird feather colors come from pigments like carotenoids or from tiny structures that refract light — both inspire animated feather designs.
🎬 The team behind Moana used lots of sketches and expression studies to make even small characters feel lively and full of personality.
How do I draw HeiHei from Moana step by step?
What materials do I need to draw HeiHei?
What ages is drawing HeiHei suitable for?
What are the benefits of drawing HeiHei for kids?
