Draw Hair in Any Style
Draw hair in different styles using pencils, markers, and references. Practice textures, shapes, and shading to create unique hairstyles and improve observation.
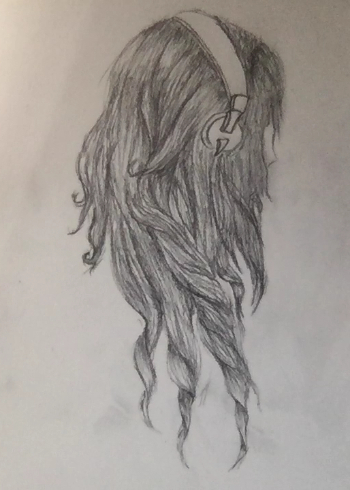
About this tutorial
Draw hair in different styles using pencils, markers, and references. Practice textures, shapes, and shading to create unique hairstyles and improve observation.
What you need
Instructions
- 1
Step 1
Gather your materials and set them on a clean flat surface so everything is ready to draw.
- 2
Step 2
Pick three reference photos that show different hair types like straight curly wavy or short so you have variety to study.
- 3
Step 3
Look closely at the first reference and notice the big shapes the hair makes around the head; say them out loud.
- 4
Step 4
Lightly draw a simple head shape on your paper to act as the base for the hair.
- 5
Step 5
Mark the hairline and the main direction the hair flows with light strokes to plan where hair will fall.
- 6
Step 6
Block in the large outer shapes of the hairstyle using soft pencil strokes to capture the overall silhouette.
- 7
Step 7
Add long flowing strokes or short choppy strokes to show the hair texture matching the reference you are copying.
- 8
Step 8
Darken areas where hair overlaps or falls into shadow to create depth using gentle pencil pressure.
- 9
Step 9
Use your eraser to lift tiny lines for highlights where the light hits the hair to make it look shiny.
- 10
Step 10
Repeat Steps 6 to 9 for your second and third reference on the same page or new pages to practice different styles.
- 11
Step 11
Use markers or colored pencils to add color and bold edges to one drawing to make that style pop.
- 12
Step 12
Share your finished hair drawings on DIY.org so others can see your cool hairstyles.
Fun facts
How do you draw hair in different styles with pencils and markers?
Start with a clear reference or photo and lightly draw the head shape. Block in big hair shapes to show volume and direction, then add flow lines to indicate hair movement. Use short strokes for straight hair, loops for curls, and varied line weight for texture. Shade with pencils from light to dark and use markers for bold sections or color. Encourage multiple attempts and compare reference to drawing to improve observation.
What materials do I need to draw hair styles with my child?
You'll need sketching pencils (HB, 2B, 4B), eraser, sharpener, blending stump or cotton bud for smoothing, marker pens or fine liners for outlines, colored pencils or markers for color, and good-quality drawing paper. Include a mirror, photos, or printed hairstyle references. Optional: ruler for head proportions and a kneaded eraser for highlights. Choose non-toxic, washable markers for younger kids and cover your workspace to protect surfaces.
What ages is this hair-drawing activity suitable for?
This activity suits children roughly ages 4–14 with adaptations. Ages 4–6 focus on simple lines and playful scribbles. Ages 7–9 practice basic shapes, flow lines, and simple shading. Ages 10–14 refine textures, realistic curls, braids, and shading techniques. Supervise young children with sharp tools and let older kids try step-by-step references. Adjust complexity and time to attention span and fine-motor skill level.
What are the benefits and safe variations of practicing hair textures and shading?
Benefits include improved observation, fine motor control, patience, and creative problem-solving. Practicing textures and shading builds understanding of light, volume, and pattern recognition. Variations: try cartoon styles, fantasy hair, braids, Afro-textured hair, or combine markers and pencils for mixed media. Safety: use non-toxic supplies, supervise scissors/sharpeners, and ensure good lighting and ventilation when using markers. Encourage experimentation rather than perfection to build c
Watch & Learn
Need help?
What can we use if we don't have 'soft pencils', markers, or printed reference photos?
Use an HB or 2B pencil for the 'soft pencil' strokes in Steps 5–7, substitute crayons or watercolor for the markers/colored pencils in Step 10, and use smartphone photos or magazine clippings for the three reference photos in Step 2.
My hair drawings look flat—what step should I redo to add depth?
Go back to Step 7 to darken overlapping areas and shadows and then use your eraser as in Step 8 to lift tiny highlight lines so the hair gains depth and shine.
How can this activity be adjusted for younger children or older kids?
For younger kids, provide a pre-drawn head from Step 4 and have them focus on blocking in shapes in Step 5 with chunky strokes, while older kids can refine texture in Step 6 and emphasize shadows/highlights in Steps 7–9 plus color in Step 10.
How can we extend or personalize the hairstyle drawings after finishing the basic steps?
Mix textures from your three references by repeating Steps 6–9 on different sections of one head, add bold color and edges per Step 10, and create a mini-portfolio to share on DIY.org as suggested in Step 11.