Draw a character from Harry Potter!
Draw a Harry Potter character using pencil and color, practice sketching basic shapes, proportions, facial features, and costume details to create a portrait.

Drawing Apps
Step-by-step guide to draw a character from Harry Potter
How to draw HARRY POTTER in FIVE STEPS! | Newsround | CBBC
Step 1
Pick which Harry Potter character you want to draw.
Step 2
Find a clear picture of that character to look at while you draw.
Step 3
Put your paper and all your materials on a clean flat surface.
Step 4
Lightly draw a simple oval for the head shape.
Step 5
Draw one vertical center line and one horizontal eye line across the oval.
Step 6
Sketch the jawline and a short neck to match the oval shape.
Step 7
Put small dots where the eyes nose mouth and ears will go.
Step 8
Draw the eyes following the dots you made.
Step 9
Draw the nose and then draw the mouth on its mark.
Step 10
Add special facial details like glasses a lightning scar or unique eyebrows.
Step 11
Draw the hair shape and simple costume lines like a collar or robe top.
Step 12
Erase the extra guide lines gently so only your drawing remains.
Step 13
Trace your final lines darker with your pencil or a fine-liner.
Step 14
Color your portrait and add simple shading to make it pop.
Step 15
Share your finished character picture on DIY.org
Help!?
What can I substitute if I don't have a fine-liner, colored pencils, or a printed reference photo?
Use a darker pencil (2B) to trace your final lines instead of a fine-liner, washable markers or crayons for coloring, and view the character on a phone or tablet screen or use a printed screenshot as your clear reference while you draw.
My portrait looks lopsided or the eyes are uneven — what should I fix?
Go back to the light oval and realign the vertical center line and horizontal eye line, reposition the small dots for eyes, nose and mouth, and then gently erase extra guide lines before darkening final lines to keep proportions correct.
How can I change this activity for younger kids or older kids?
For younger kids, pre-draw the oval, center and eye guidelines and let them add simple hair, glasses or scar and color with crayons, while older kids can refine the jawline, add detailed facial features, trace with a fine-liner and practice shading for depth.
How can we extend or personalize the drawing once the portrait is finished?
Add personalized touches like a wand, house scarf or background scene when you draw the hair and costume lines, experiment with extra shading and color to make it pop, or create a series of characters and share them on DIY.org.
Watch videos on how to draw a character from Harry Potter
How To Draw A Cartoon Harry Potter And Hedwig
4 Videos
How To Draw A Cartoon Harry Potter And Hedwig
How to Draw Harry Potter Easy Chibi
How to Draw a Cute Harry Potter Fan Girl 🤩
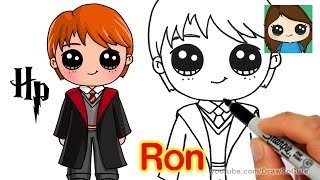
How to Draw Ron Weasley Easy | Harry Potter
Facts about portrait drawing and character design
🧙♂️ Harry Potter first appeared in the 1997 novel "Harry Potter and the Philosopher's Stone."
🎨 Artists often block in portraits with simple shapes (ovals, circles, and guide lines) before adding details — a great trick for sketching characters.
👓 Harry's round glasses and lightning-bolt scar are his most recognizable features — perfect details to include in a portrait.
🏫 Hogwarts is divided into four houses (Gryffindor, Slytherin, Ravenclaw, Hufflepuff) — house colors help design costumes and accessories.
🖌️ In the Wizarding World, many portraits are painted to move — a fun reminder that characters in art can seem alive!
How do I draw a Harry Potter character portrait step by step?
What materials do I need to draw a Harry Potter character?
What ages is drawing a Harry Potter character suitable for?
What are the benefits of drawing a Harry Potter character with my child?
