Do Quilling
Make decorative paper quilling designs using narrow paper strips, rolling tools, glue, and simple shapes to create cards, flowers, and patterns.


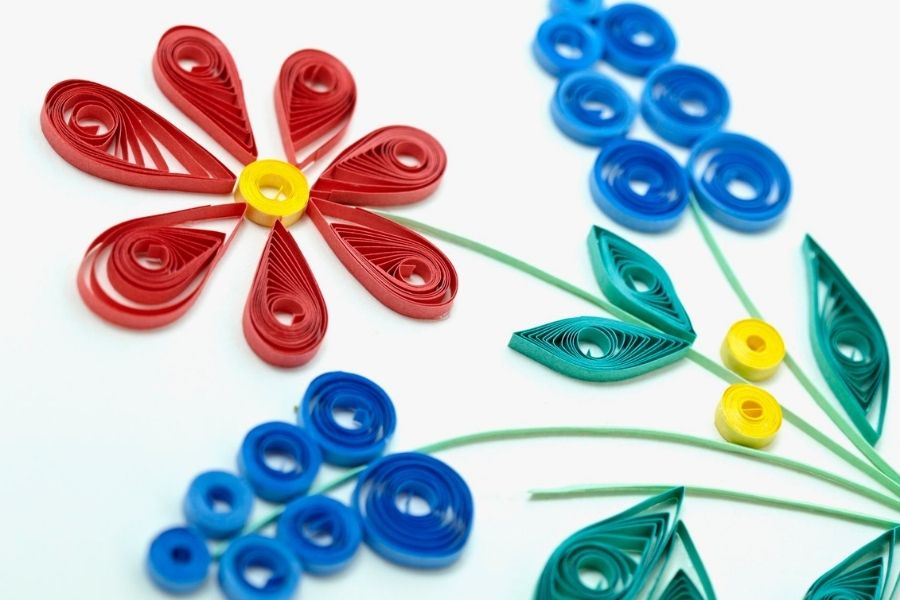

Step-by-step guide to make paper quilling designs
Step 1
Clear a flat workspace and place a scrap sheet of paper to catch glue and bits.
Step 2
Lay out all the materials from the list where you can reach them easily.
Step 3
Pick a simple design like a flower a heart or a repeating pattern and choose 2 or 3 colors.
Step 4
Put one end of a paper strip into the slotted quilling tool or wrap it once around a toothpick and roll to make a tight coil.
Step 5
Slide the coil off the tool and let it loosen on the table until it reaches the size you want.
Step 6
Put a tiny dab of glue on the loose strip tip and press it to the coil to hold it shut.
Step 7
Pinch the coil on one side to make a teardrop petal or pinch two sides to make a leaf shape.
Step 8
Repeat Steps 4 to 7 to make all the petals leaves and center pieces you need for your design.
Step 9
Arrange the finished pieces on the blank card without glue to test how the design looks.
Step 10
Put a tiny dab of glue on the base of one piece.
Step 11
Press that piece onto the card and hold it for a few seconds until it sticks.
Step 12
Repeat Steps 10 and 11 to attach all petals leaves and the center coil or other shapes.
Step 13
Let your card dry flat under a book or light weight for 10 to 15 minutes.
Step 14
Trim any extra strip tails with scissors if needed.
Step 15
Share your finished quilling creation on DIY.org
Help!?
What can we use instead of a slotted quilling tool or pre-cut paper strips?
If you don't have a slotted quilling tool, wrap the strip once around a toothpick as shown in Step 4 or use a thin knitting needle, and if you lack pre-cut strips cut printer paper or magazine pages into 3–5 mm strips to use in Steps 4–7.
My coils keep unrolling or the shapes lose form — what should I do?
If coils unroll, re-roll them slightly tighter on the slotted tool or toothpick, let them loosen to the size you want (Step 5), then secure the loose strip tip with a tiny dab of glue (Step 6) and hold until it sticks.
How can I adapt this quilling activity for different age groups?
For younger children use wider paper strips and pre-made coils to arrange on the blank card (Step 8) while an adult glues pieces in Steps 10–11, and for older kids use narrower strips, more colors, and pinch varied shapes (Step 6) for more detailed designs.
How can we enhance or personalize the finished quilled card?
Personalize by using patterned or metallic paper strips, layering extra coils for 3D effects before attaching (Steps 8–11), pressing the card flat under a book to dry (Step 13), and then share the finished quilling creation on DIY.org as suggested.
Watch videos on how to make paper quilling designs
Paper Quilling For Beginners | Basic Shapes Tutorial + Make A Quilled Flower
4 Videos
Paper Quilling For Beginners | Basic Shapes Tutorial + Make A Quilled Flower

Paper Quilling for Beginners | Paper Crafts
35 Paper Quilling Shapes: Art & Craft Tutorials by HandiWorks
How to quill the Basic Shapes of Paper Quilling for Beginners & The Tips and Tricks of Quilling
Facts about paper crafts for kids
🎨 Quilling (paper filigree) dates back to the Renaissance when artists and nuns rolled paper to imitate metalwork.
✂️ Quilling uses thin strips of paper—commonly about 1/8 inch (3 mm) wide—that are rolled, shaped, and glued into designs.
🌸 By pinching and shaping coils you can make petals, leaves, and 3D flowers perfect for cards and decorations.
🧰 A slotted quilling tool or needle tool helps roll tight, consistent coils much faster than using just fingers.
📬 Adding even one small quilled element can turn a plain greeting card into a keepsake piece of art.
How do you do paper quilling to make cards, flowers, and patterns?
What materials do I need for quilling crafts?
What ages is quilling suitable for?
What are the benefits and safety tips for kids doing quilling?
