Design Anime Eyes w/ DIY Star LongLeggedLucy
Design and draw anime-style eyes on a DIY Star LongLeggedLucy character template, learning shading, highlights, and expressive features using safe art supplies.
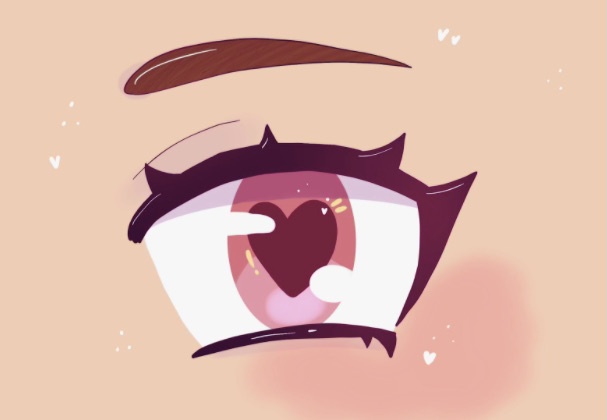
About this activity
Design and draw anime-style eyes on a DIY Star LongLeggedLucy character template, learning shading, highlights, and expressive features using safe art supplies.
What you need
Step by step
- 1
Step 1
Find a clean well lit table to work on.
- 2
Step 2
Place the DIY Star LongLeggedLucy template flat on the table.
- 3
Step 3
Decide what expression you want the eyes to show like happy surprised or shy.
- 4
Step 4
Lightly sketch the basic outer eye shapes on the template with your pencil.
- 5
Step 5
Draw an iris and a pupil inside each eye shape using light pencil lines.
- 6
Step 6
Sketch small highlight shapes inside each iris where the light will reflect.
- 7
Step 7
Draw thin curved lines for the upper and lower eyelids.
- 8
Step 8
Shade each iris with a light base color using a colored pencil.
- 9
Step 9
Add a darker tone along the top edge of each iris to create depth.
- 10
Step 10
Gently blend the iris colors with a cotton swab or blending stump.
- 11
Step 11
Carefully trace the main eye outlines and eyelid lines with the fine tip black marker.
- 12
Step 12
Add eyelashes with short curved strokes on the upper lids.
- 13
Step 13
Draw eyebrows above the eyes that match the expression you chose.
- 14
Step 14
Use a white gel pen or tiny brush with opaque white paint to fill the highlight shapes and add sparkles.
- 15
Step 15
Share your finished DIY Star LongLeggedLucy with anime eyes on DIY.org
Fun facts
How do I design and draw anime-style eyes on the DIY Star LongLeggedLucy template?
Start by printing the Star LongLeggedLucy template and lightly sketching eye placement with an HB pencil. Draw the basic eye shape and guide lines for eyelids and iris. Block in the pupil and main shadow areas, decide a light source, then add highlights with a white gel pen. Shade with colored pencils or soft markers, blending from dark to light for depth. Finish eyelashes, refine line art, erase guidelines, and optionally spray a low-odor, non-toxic fixative. Practice expressions by changing ir
What materials do I need to design anime eyes on the Star LongLeggedLucy template?
You'll need a printed Star LongLeggedLucy template, HB and 2B pencils, a kneaded or vinyl eraser, colored pencils or alcohol-free markers, a white gel pen for highlights, a blending stump or cotton swab, a fine-tip black pen for outlines, child-safe scissors (if cutting), a smock and washable mat, and an optional low-odor non-toxic fixative. Choose non-toxic, washable supplies and avoid permanent markers for very young children.
What ages is the Design Anime Eyes w/ DIY Star LongLeggedLucy activity suitable for?
This activity suits kids roughly ages 5–14. Preschoolers (3–5) can join with heavy adult help for basic coloring and sticker highlights. Ages 6–9 enjoy guided drawing and simple shading, while 10–14 can practice advanced shading, reflections, and expressive subtleties. Adjust tools—thicker pencils and washable markers for younger children, finer pencils and blending tools for older kids. Always supervise scissors and small parts for children under 8.
What are the benefits of designing anime eyes and are there safety tips or variations?
Designing anime eyes builds fine motor skills, observational drawing, and emotional literacy—kids learn to convey mood through eyes. It encourages patience, color theory, and creativity. For safety, use non-toxic, washable supplies, keep a well-ventilated area if spraying fixative, and supervise scissors and small tools. Variations include trying chibi proportions, glitter pens for sparkle, or converting the template to a digital drawing app for older children.
Watch & Learn
Need help?
What can I use instead of a fine-tip black marker, blending stump, or white gel pen?
Use a sharpened mechanical pencil or a thin black acrylic paintbrush to trace the main eye outlines instead of a fine-tip black marker, substitute a cotton swab for a blending stump when you 'Gently blend the iris colors', and replace the white gel pen highlights with a tiny dab of opaque white acrylic or correction fluid applied with a toothpick.
The marker smudged or my pencil lines still show after tracing—how do I fix this?
If ink smudges or pencil lines show after you 'Carefully trace the main eye outlines', let the marker dry completely, gently erase leftover pencil from the 'Lightly sketch' step with a soft eraser, and touch up smudges with another thin pass of the marker or a small brush of black acrylic.
How can I adapt this activity for preschoolers, elementary kids, and teens?
For preschoolers, pre-draw bold outer eye shapes and have them color the 'Shade each iris with a light base color' step with crayons; for elementary kids, follow the full sequence but use washable markers and guided cotton-swab blending; for teens, add layered colored-pencil shading, a darker tone along the top edge of each iris, finer eyelashes, and more expressive eyebrow shapes before inking and highlighting.
How can we extend or personalize the finished DIY Star LongLeggedLucy with anime eyes?
Personalize the piece by experimenting with iridescent or metallic colored pencils when you 'Shade each iris', adding tiny star stickers or glitter around the white-gel-pen 'sparkles', varying eyebrow and eyelash styles from the 'Draw eyebrows' and 'Add eyelashes' steps, and scanning the final artwork to create digital stickers to share on DIY.org.