Design a Coat of Arms
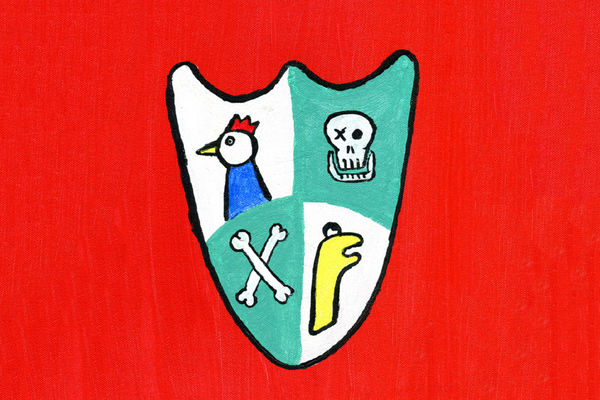
Design and create your own coat of arms using paper, markers, child-safe scissors, and glue; choose symbols, colors, and a motto to represent you.
About this tutorial
Design and create your own coat of arms using paper, markers, child-safe scissors, and glue; choose symbols, colors, and a motto to represent you.
What you need
Instructions
- 1
Step 1
Clear a clean workspace and lay out all your materials where you can reach them.
- 2
Step 2
Think of three things that represent you and choose one simple symbol for each thing.
- 3
Step 3
Pick two or three colors that match your personality and plan where each color will go.
- 4
Step 4
Lightly draw a large shield shape in the center of the paper with your pencil.
- 5
Step 5
Use pencil lines to divide the shield into sections (for example halves or quarters).
- 6
Step 6
Lightly sketch each of your chosen symbols into a different section of the shield with your pencil.
- 7
Step 7
Draw a ribbon or banner shape under the shield with pencil for your motto.
- 8
Step 8
Trace over all pencil outlines of the shield symbols and banner with a marker.
- 9
Step 9
Color each shield section and symbol using the colors you picked.
- 10
Step 10
Add small decorative details like dots stripes or borders with a marker.
- 11
Step 11
Carefully cut out the shield shape from the paper using child-safe scissors.
- 12
Step 12
Glue the cut-out shield onto a fresh piece of paper or poster to make it stronger.
- 13
Step 13
Write a short clear motto inside the banner using a marker.
- 14
Step 14
Add one final flourish like a border or tiny icons around your shield to finish the design.
- 15
Step 15
Take a photo of your finished coat of arms and share it on DIY.org.
Fun facts
How do you design a coat of arms with kids?
To design a coat of arms, start by brainstorming symbols, colors, and a short motto that represent the child. Draw a shield outline on paper and divide it into 2–4 sections. Sketch symbols in each section, then choose meaningful colors. Trace outlines with markers, color or cut colored paper shapes and glue them in place. Add a banner for the motto and a decorative border. Let the work dry before displaying. Encourage storytelling about each symbol as you work.
What materials do I need to make a child-friendly coat of arms?
You'll need plain or colored paper, child-safe scissors, non-toxic glue stick or liquid glue, washable markers or crayons, pencils and eraser, ruler, and scrap colored paper for collage. Optional extras: stickers, glitter glue, foam shapes, stencils, and a hole punch to hang the finished coat of arms. For younger children, pre-cut shapes and printed templates speed things up and reduce frustration.
What ages is designing a coat of arms suitable for?
This activity suits ages 4–12 with adjustments. Ages 4–6 enjoy choosing colors and placing pre-cut shapes with adult help using safe scissors and glue. Ages 7–9 can draw, cut and assemble simple sections independently. Ages 10–12 can design more detailed symbolism, write mottos, and experiment with layout and mixed materials. Always supervise scissors and small decorations for younger kids, and offer templates or examples to guide each age group.
What safety tips should I follow when kids make a coat of arms?
Use child-safe scissors, non-toxic glue and washable markers. Work on a flat, protected surface and wear smocks to avoid stains. Keep small items like sequins away from children under 3 and supervise use of glue and scissors for younger kids. Show proper scissor handling and store sharp tools out of reach after use. If using glitter or tiny decorations, consider glue-only application and clean up thoroughly to avoid ingestion or slipping hazards.
Watch & Learn
Need help?
What can we use instead of hard-to-find items like child-safe scissors, markers, or poster board?
If you don't have child-safe scissors, use adult scissors with supervision or tear along the shield outline, color the sections with crayons or colored pencils instead of markers when you trace and color the shield, and glue your cut-out shield onto cardboard from a cereal box rather than a poster.
What should we do if the paper tears while cutting or the colors smear when tracing over pencil lines?
If the paper tears while you carefully cut out the shield, reinforce it first by gluing the drawing onto cardboard or using clear tape along the cut line, and if marker smears when you trace over pencil, let each inked line dry or switch to colored pencils for the final outlines.
How can I change this activity to suit different ages?
For younger children, pre-draw the large shield and divide the sections and give stickers for symbols and help write the motto on the banner, while older kids can add extra quarters, intricate marker details, patterns like dots or stripes, and photograph the finished coat of arms to upload to DIY.org.
How can we extend or personalize the finished coat of arms beyond the basic instructions?
To enhance your design, glue on fabric scraps, ribbon, or small craft gems around the shield border, use metallic or gel markers for final flourishes, or mount and laminate the glued poster before taking the photo to share on DIY.org.