Decorate with a woodburner
Safely decorate a wooden coaster using a supervised woodburning tool, trace simple patterns, and learn safety steps for handling the hot tool.
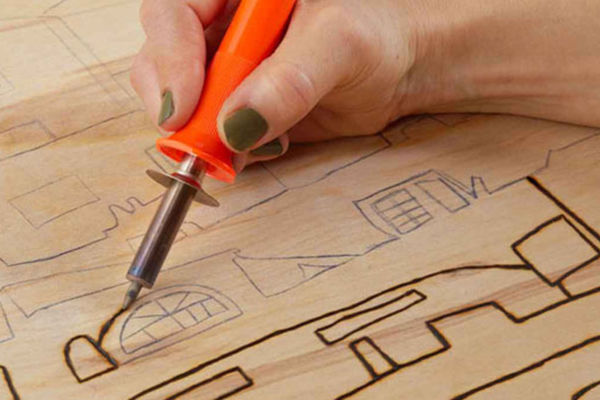
About this activity
Safely decorate a wooden coaster using a supervised woodburning tool, trace simple patterns, and learn safety steps for handling the hot tool.
What you need
Step by step
- 1
Step 1
Gather all the Materials Needed and put them on your workspace.
- 2
Step 2
Clear a table and put the heat-proof surface in the middle of your workspace.
- 3
Step 3
Put on your safety goggles.
- 4
Step 4
Put on your heat-resistant glove on the hand you will not use to hold the tool.
- 5
Step 5
Place the tracing paper or stencil on the wooden coaster and tape it down so it won’t move.
- 6
Step 6
Trace the design onto the coaster with your pencil using light pressure.
- 7
Step 7
Ask an adult to plug in the woodburning tool and set it to a low heat setting.
- 8
Step 8
Practice drawing one steady line on the scrap wood with the woodburner to feel its heat and speed.
- 9
Step 9
Carefully trace the pencil outline on your coaster with the woodburner in slow steady motions.
- 10
Step 10
Add shading or thicker lines by going over areas again gently with the woodburner.
- 11
Step 11
Ask an adult to wipe the hot tip on the tip cleaner or damp sponge if it gets gunked.
- 12
Step 12
Ask an adult to unplug the woodburner and place it on its heat-proof rest, then let the tool and coaster cool fully.
- 13
Step 13
Erase any remaining pencil marks from the coaster once it is cool.
- 14
Step 14
Ask an adult to brush a thin coat of clear sealer on the coaster and let it dry if you want to protect your design.
- 15
Step 15
Share your finished woodburned coaster on DIY.org.
Fun facts
How do you safely decorate a wooden coaster with a woodburner?
To decorate a wooden coaster, sand it smooth and sketch a simple pattern with pencil. Set the woodburner on a heat-resistant mat and have an adult plug it in and select a low temperature. The adult demonstrates steady, slow tracing while the child guides or points to lines. Work in short sessions, let the tip cool between passes, and finish by sealing the coaster with a clear, non-toxic finish once fully cooled.
What materials do I need to decorate a wooden coaster with a woodburner?
You’ll need an unfinished wooden coaster, a temperature-controlled woodburning tool with a fine tip, pencil and eraser for sketching, fine-grit sandpaper, and a heat-resistant work surface or mat. Include clamps or tape to secure the piece, protective gloves and safety goggles, and a well-ventilated area or small fan. Have a metal tip cleaner, a jar of water, and a clear non-toxic sealer (water-based polyurethane or beeswax). Always supervise.
What ages is woodburning a coaster suitable for?
This activity is best for children aged 12 and up who can follow safety instructions and stay focused under close adult supervision. Children 6–11 can design and trace patterns or hold the coaster while an adult operates the tool. For preschoolers, offer safe alternatives like stickers or coloring. Assess each child’s maturity, hand steadiness, and attention span before allowing any hands-on involvement with hot tools.
What safety steps should we follow when using a woodburner with kids?
Safety first: always have an adult present when the tool is plugged in. Work in a ventilated area, secure the coaster, and use a heat-resistant mat. Never touch the hot tip; wear safety goggles and heat-resistant gloves. Unplug when idle, keep a bowl of water and first-aid kit nearby, and avoid burning painted or synthetic surfaces. Teach children to stand back while the adult controls the tool and to wait until everything has cooled.
Watch & Learn
Need help?
I don't have tracing paper or a heat-proof surface — what can I substitute?
If you don't have tracing paper, use carbon paper or place a printed design face-down and rub the pencil to transfer it, and for the heat-proof surface in step 2 use a ceramic tile or a metal baking sheet instead of a specialty board.
My woodburner keeps snagging or making uneven lines — how can I fix that?
Practice one steady line on the scrap wood as instructed in step 8 to find the right heat and speed, then trace in slow steady motions without pressing (step 9) and ask an adult to clean a gunked tip on the tip cleaner or damp sponge per step 11.
How should we adapt this activity for different ages?
For very young kids let them tape the stencil (step 5) and draw the design while an adult operates and plugs/unplugs the woodburner (steps 7 and 12), for elementary-aged kids have them trace with a pencil (step 6) and practice on scrap wood under supervision, and for teens allow them to use the warmed tool with safety goggles and the heat-resistant glove while an adult stays nearby.
How can we personalize or improve the finished coaster?
After letting the tool and coaster cool (step 12) and erasing pencil marks (step 13), personalize with colored wood stain or pencils, brush on the clear sealer in step 14, and add felt pads to the bottom before sharing on DIY.org.