Create a new diy mascot
Design and build your own DIY mascot using recycled materials, fabric, glue, and craft supplies, then give it a name, costume, and story.
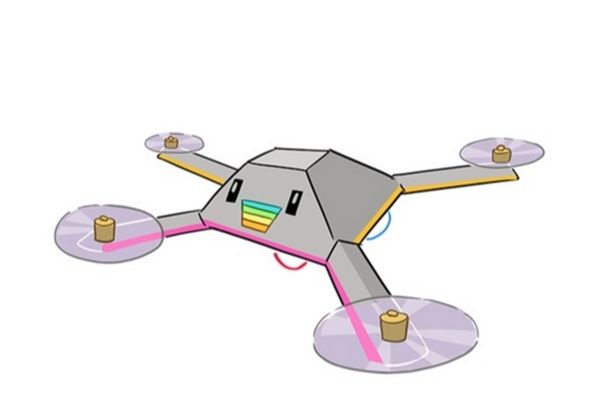
About this activity
Design and build your own DIY mascot using recycled materials, fabric, glue, and craft supplies, then give it a name, costume, and story.
What you need
Step by step
- 1
Step 1
Choose what kind of mascot you want to make such as an animal monster robot or superhero and imagine one special trait it has.
- 2
Step 2
Draw a simple sketch of your mascot showing its body shape costume and one or two accessories.
- 3
Step 3
Gather the materials from the list and set them out in a clear workspace.
- 4
Step 4
Build the mascot body by gluing or taping recycled pieces together until the shape is steady.
- 5
Step 5
Cut fabric into clothing pieces like a shirt cape or dress and attach them to the body with glue or tape.
- 6
Step 6
Make facial features by using buttons felt or markers and attach or draw them onto the mascot.
- 7
Step 7
Create arms legs or a tail from pipe cleaners straws or fabric and fasten them to the mascot body.
- 8
Step 8
Stuff hollow parts with cotton balls or old socks to give your mascot a soft shape and seal the opening with tape or glue.
- 9
Step 9
Add decorations like beads ribbons stickers or sparkles to make your mascot colorful and unique.
- 10
Step 10
Put on any final costume pieces like a hat mask or cape to complete the outfit.
- 11
Step 11
Give your mascot a name and write a short story about who it is what it loves and where it lives on a small card.
- 12
Step 12
Share your finished mascot and its story on DIY.org
Fun facts
How do I design and build a DIY mascot with my child?
Start by brainstorming a mascot idea and sketching its look, name, and backstory. Gather recycled boxes, bottles, fabric scraps, glue, tape, scissors, and decorations. Build a core (cardboard tube, bottle, or stuffed fabric), attach limbs and features with glue or tape, add eyes, nose, and costume pieces, then decorate. Finish with a name and short story to bring the mascot to life. Supervise younger children for cutting and hot glue.
What materials do I need to make a DIY mascot from recycled materials?
You'll need recycled containers (cardboard boxes, paper towel rolls, plastic bottles), fabric scraps, stuffing (cotton or old clothes), craft glue and/or a low-temp hot glue gun, scissors, tape, markers or paint, googly eyes or buttons, pipe cleaners, yarn, needles and thread for sewing, and optional embellishments like ribbons or stickers. Keep safety supplies like a small first-aid kit and adult supervision for cutting or hot glue.
What ages is creating a DIY mascot suitable for?
This activity suits ages about 3–12+, with adaptations. Preschoolers (3–5) enjoy simple decorating and naming with adult help for cutting. Ages 6–8 can assemble parts, use glue, and start simple sewing with supervision. Ages 9+ can design more complex costumes, use sharper tools safely, and write detailed backstories. Always supervise hot glue, scissors, and small parts to prevent choking or burns.
What are the benefits of making a DIY mascot and are there safety tips?
Making a DIY mascot fosters creativity, problem solving, and fine motor skills as kids plan, cut, glue, and sew. It teaches recycling and resourcefulness by reusing materials, boosts storytelling and language when naming and crafting a backstory, and builds confidence and social skills if done in groups. For safety, choose non-toxic glue, avoid small parts for young children, and supervise hot glue or sharp tools.
Watch & Learn
Need help?
What can we use if pipe cleaners, felt, or cotton balls are unavailable?
Use twist ties or floral wire instead of pipe cleaners for arms or a tail, cut old t-shirts or paper from cereal boxes into facial features in place of felt, and stuff hollow parts with crumpled newspaper or an old sock instead of cotton balls.
My mascot body keeps falling apart when I glue recycled pieces—what should I try?
Reinforce the joints from the 'Build the mascot body by gluing or taping recycled pieces together' step with extra tape on both sides, add cardboard tabs to slot and glue pieces together, and use hot glue (with adult help) for a stronger bond while letting it dry fully before adding weight or decorations.
How can I adapt this activity for a 3-year-old versus a 12-year-old?
For a 3-year-old, simplify by pre-cutting fabric clothing and using stickers and tape to attach parts from the 'Cut fabric into clothing pieces' and 'Add decorations' steps with close supervision, while a 12-year-old can sew clothing, create jointed arms from straws and brads in the 'Create arms legs or a tail' step, and write a longer story card.
How can we make the mascot more special or interactive beyond decorations?
Turn decorations into features by making movable limbs with straws and brads from the 'Create arms legs or a tail' step, add a small voice recorder or LED light hidden inside stuffed hollows from the 'Stuff hollow parts' step, and expand the short story card into a mini-book to share on DIY.org.