Create a diorama
Build a shoebox diorama of a habitat using simple materials like paper, paint, toy figures, and glue to explore ecosystems and storytelling.
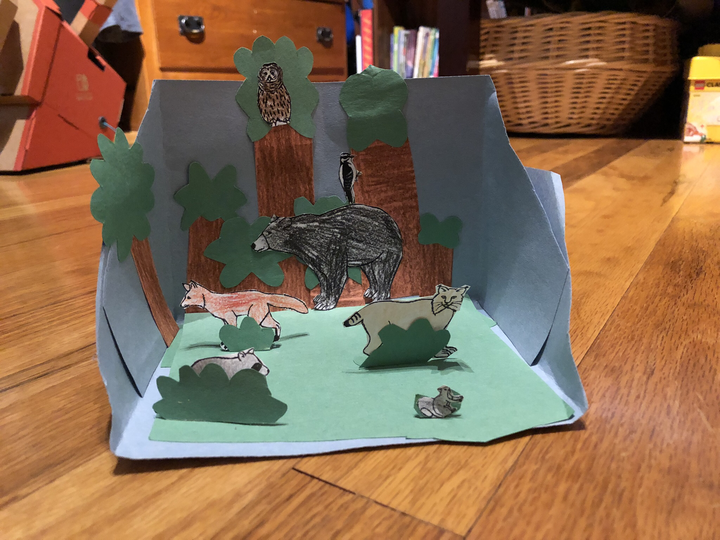
About this activity
Build a shoebox diorama of a habitat using simple materials like paper, paint, toy figures, and glue to explore ecosystems and storytelling.
What you need
Step by step
- 1
Step 1
Choose which habitat you want to create such as forest desert ocean pond or Arctic and imagine the story that will happen there.
- 2
Step 2
Place the shoebox on a table with the open side facing you.
- 3
Step 3
Paint the inside back wall to create the main background like sky water or rock.
- 4
Step 4
Let the paint dry completely.
- 5
Step 5
Cut shapes from colored paper for background details like sun clouds seaweed or mountains.
- 6
Step 6
Glue the paper shapes to the painted back wall.
- 7
Step 7
Crumple a sheet of brown paper to make floor texture like soil sand or sea bottom.
- 8
Step 8
Glue the crumpled paper to the bottom of the box.
- 9
Step 9
Cut paper shapes to make trees plants coral or rocks.
- 10
Step 10
Attach the paper plants or natural materials like leaves and twigs to the base with glue or tape.
- 11
Step 11
Position your toy figures or paper animal cutouts where they belong in the habitat.
- 12
Step 12
Write short name labels for one or two animals on small paper strips.
- 13
Step 13
Stick the name labels near the animals using tape or glue.
- 14
Step 14
Let all glued and taped parts dry and set before moving the diorama.
- 15
Step 15
Share your finished diorama on DIY.org.
Fun facts
How do I build a shoebox diorama of a habitat?
To build a shoebox diorama, choose a habitat (forest, desert, ocean) and sketch a simple plan. Paint or glue paper inside to make a background, then add a base layer for ground or water using painted cardboard, sand, or tissue. Arrange toy figures, clay animals, or cutout paper plants and glue them in place. Add labels or a short story card. Let glue and paint dry fully before handling.
What materials do I need to make a shoebox habitat diorama?
You'll need a shoebox, scissors (or child-safe snips), white glue and craft glue, paint and brushes, colored paper or tissue, markers, small toy animals or printed cutouts, modeling clay, tape, and basic craft supplies like cotton, sand, or pebbles for texture. Optional items: hot glue (adult use), foam stickers, and natural finds like twigs or leaves. Substitute household items when on a budget.
What ages is a shoebox diorama activity suitable for?
This activity suits children roughly aged 4 to 12. Ages 4–6 enjoy simple gluing, painting, and placing toys with adult help for cutting and small pieces. Ages 7–9 can plan layouts, add details, and use glue independently with supervision. Ages 10–12 can research species, create intricate habitats, and write a short presentation. Always supervise scissors, small parts, and hot glue, adjusting tasks for skill level.
What are the benefits of making a shoebox habitat diorama?
Making a shoebox diorama teaches habitat science, observation, and storytelling while boosting fine motor skills, planning, and creativity. Children learn about food chains, plant and animal adaptations, and spatial relationships as they arrange scenes. Presenting their diorama builds communication and confidence. It's a low-cost, hands-on cross-curricular project that supports science, art, and language skills. For safety, avoid small choking hazards for young children and use non-toxic materia
Watch & Learn
Need help?
What can we use if we don't have a shoebox, paint, or colored paper?
Use a cereal or pizza box instead of a shoebox, color the inside back wall with washable markers or crayons instead of paint, and cut shapes from magazine pages, tissue paper, or wrapping paper in place of colored paper.
My pieces keep falling off because paint or glue isn't dry—how can we fix that?
Make sure you let the paint on the inside back wall and the crumpled brown-paper floor dry completely, apply thinner coats, speed drying with a hairdryer on low, and secure plants or animal cutouts with stronger double-sided tape or tacky craft glue while holding them in place until set.
How can we adapt this diorama activity for different ages?
For preschoolers use a larger box, pre-cut big paper shapes, stickers and glue dots for the crumpled brown-paper floor; for elementary kids have them paint the inside back wall, cut plants and write name labels themselves; and for older kids add movable animals with brads, layered backgrounds, or LED lights and a written habitat story to share on DIY.org.
What are simple ways to enhance or personalize the finished diorama?
Add real sand or small pebbles glued to the crumpled brown-paper floor for texture, create pop-up trees or layered cardstock foregrounds so toy figures can move, laminate the name labels for durability, and photograph the scene to post on DIY.org.