Craft Some Cranes!
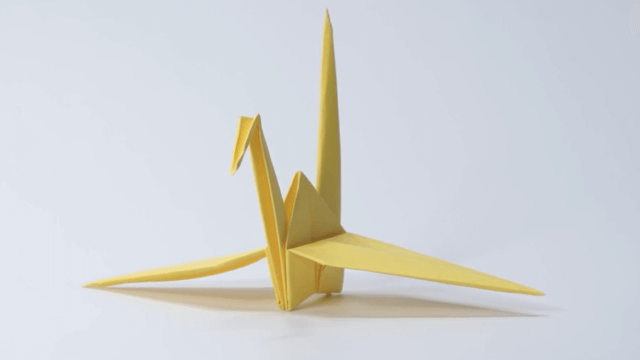
Fold colorful paper cranes using simple origami steps, decorate them, and learn about patience, symmetry, and cultural meaning through hands on crafting.
About this activity
Fold colorful paper cranes using simple origami steps, decorate them, and learn about patience, symmetry, and cultural meaning through hands on crafting.
What you need
Step by step
- 1
Step 1
Clear a flat workspace and lay out your paper and colouring materials.
- 2
Step 2
Place one colored square paper color-side down on the workspace.
- 3
Step 3
Fold the paper diagonally corner to corner to make a triangle crease then unfold; repeat for the other diagonal so you have X creases.
- 4
Step 4
Fold the paper in half top to bottom to make a + crease and then unfold.
- 5
Step 5
Collapse the paper into a preliminary square base by bringing the four corners together and pressing flat.
- 6
Step 6
With the open corner pointing toward you fold the right and left edges of the top layer to the center crease and press to form a kite shape.
- 7
Step 7
Fold the small top triangle flap down over those folds to make a crease then unfold that flap.
- 8
Step 8
Open the front bottom flap and lift it up into a petal fold to form a long diamond shape; press flat.
- 9
Step 9
Turn the paper over and repeat Steps 6 to 8 on the other side to complete the bird base.
- 10
Step 10
Fold one of the thin top points down to make the crane’s head and crease well.
- 11
Step 11
Gently pull the two large side flaps outward to create the wings and crease the wing bases so the crane holds its shape.
- 12
Step 12
Decorate your crane with colouring materials and stickers to make it bright and unique.
- 13
Step 13
Pause and say or write one sentence about patience symmetry or what the crane means in some cultures to practice thinking about its meaning.
- 14
Step 14
Share your finished crane on DIY.org
Fun facts
How do you do the Craft Some Cranes! activity?
To make colorful paper cranes, start with a square sheet. Fold it in half diagonally both ways and unfold, then fold edges to form a square base. Fold to create the bird base, lift and fold the wings, pull the head and tail into shape, crease well. Finish by decorating with markers, stickers, or glitter glue. Use simple printed step diagrams or a short video to guide younger kids through each fold.
What materials do I need for Craft Some Cranes!?
You’ll need colorful square origami paper in various sizes (about 3–6 inches / 7.5–15 cm). Also gather child-safe scissors if you need to cut squares from printer paper, a ruler and pencil for measuring, washable markers, stickers, glue sticks, and non-toxic glitter glue or craft paint for decorating. Provide a flat workspace, a small bowl of cloth wipes, and optional string if you want to hang the cranes. Keep tiny decorations away from toddlers.
What ages is Craft Some Cranes! suitable for?
This craft suits ages 4–5 with close adult help, as folding and precision may be tricky. Ages 6–8 can follow simple diagrams and perform most folds with brief guidance. Ages 9+ can fold independently, experiment with sizes and advanced cranes, and lead group projects. For younger children (2–4), use pre-folded cranes to decorate or let them glue shapes onto paper while supervising to prevent choking on small pieces.
What are the benefits of folding and decorating paper cranes?
Making paper cranes builds fine motor skills, hand-eye coordination, patience, and spatial reasoning through symmetry and step sequences. It introduces cultural learning about Japanese traditions like senbazuru and encourages mindfulness. For safety, use non-toxic materials and supervise small parts; avoid glitter for very young children. Variations include creating a mobile, stringing cranes into garlands, trying different paper sizes and patterns, or folding alternate origami birds to compare
Watch & Learn
Need help?
What can I use instead of colored square paper and stickers if I don’t have them?
If you don’t have a pre-cut colored square to 'Place one colored square paper color-side down', make a square by folding a regular sheet corner to edge and trimming the excess, and substitute stickers with markers, crayons, or cut scrap paper for decorating.
My paper won’t collapse into the preliminary square base or the petal fold keeps ripping—how can I fix that?
For a stubborn preliminary square base (Step 4) and a tricky petal fold (Steps 6–8), re-crease the X and + folds firmly with your fingernail, slowly bring all four corners together while guiding the paper inward, and lift the bottom flap gently into the petal fold on a flat surface to avoid ripping.
How can I adapt the folding steps for different age groups?
For toddlers, an adult can pre-fold through the bird base (Steps 1–8) so they can decorate and practice wings (Steps 9–11), elementary-aged kids can follow the full sequence with simple verbal prompts, and older kids can try smaller squares or multiple cranes and more detailed decorations after Step 11.
How can we extend or personalize the finished crane project?
After decorating your crane (Step 11) and writing a sentence about patience or the crane’s meaning (Step 12), personalize and extend the activity by folding cranes in different sizes and patterned paper, stringing a group into a garland or mobile, or creating a short story for each crane before sharing on DIY.org (Step 13).