Craft an origami kitty
Fold an origami kitty from a square sheet of paper, follow step by step folding instructions, and add whiskers and ears to personalize your kitten.


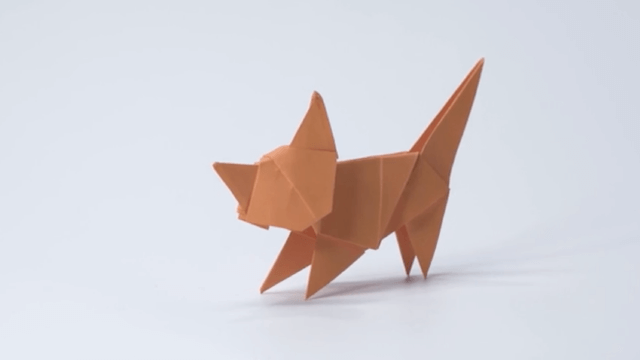

Step-by-step guide to craft an origami kitty
Step 1
Place your square sheet of paper on a flat surface with one corner pointing toward you like a diamond.
Step 2
Fold the paper in half diagonally by bringing the bottom corner up to meet the top corner and press the crease firmly.
Step 3
Make sure the triangle has the long straight edge facing you before the next fold.
Step 4
Fold the right corner of only the top layer up toward the top point to make the right ear and press the crease.
Step 5
Fold the left corner of only the top layer up toward the top point to make the left ear and press the crease.
Step 6
Fold the bottom tip of the triangle up about one third of the way to form the cat’s chin and press the crease.
Step 7
Fold the tiny tip of the right ear back slightly to shape the ear and press the crease.
Step 8
Fold the tiny tip of the left ear back slightly to shape the ear and press the crease.
Step 9
Flip your kitty over so the face side is showing.
Step 10
Use your colouring materials to draw two eyes and a small triangle nose on the face.
Step 11
Use the black marker to draw three whiskers on each side of the nose.
Step 12
Add stickers stripes or your name to personalize your origami kitty.
Step 13
Share a photo of your finished origami kitty on DIY.org
Help!?
What can we use if we don't have a square sheet of paper or origami paper?
Fold a standard rectangular sheet's bottom corner up to the opposite edge, cut or tear off the extra strip along the crease to make a square, then place it "with one corner pointing toward you like a diamond" and continue from step 2.
My ears look uneven or I accidentally folded both layers—how can I fix that?
Open the model back to the triangle, make sure the long straight edge is facing you, then refold only the top layer for the right ear and then the left ear up toward the top point, aligning creases and pressing firmly so the ears match.
How can I adapt this origami kitty for different ages?
For toddlers and preschoolers, pre-fold through the diagonal triangle (step 2) and let them fold the ears (steps 4–5) and decorate (steps 11–13), while older kids can make the chin smaller (step 6), shape ear tips (steps 7–8), or add detailed fur patterns before sharing on DIY.org.
What are simple ways to make my finished origami kitty more creative or functional?
After completing the folds and drawing the face (steps 11–12), glue a paper tail or a popsicle stick to the back, use thread or thin paper for whiskers instead of marker, and add stickers or stripes and your name (step 13) to make a puppet, bookmark, or personalized keepsake to photograph for DIY.org.
Watch videos on how to craft an origami kitty
[DETAILED TUTORIAL] Origami Cat | Easy DIY Paper Folding for Beginners
4 Videos
![[DETAILED TUTORIAL] Origami Cat | Easy DIY Paper Folding for Beginners](https://img.youtube.com/vi/XkzEM1atr-Y/mqdefault.jpg)
[DETAILED TUTORIAL] Origami Cat | Easy DIY Paper Folding for Beginners
Cute Origami Cat - How to Fold a Paper Cat Easy
Easy Origami Cat - Perfect for Kids & Beginners! 🐱
EASY ORIGAMI CAT TUTORIAL | HOW TO MAKE ORIGAMI CAT STEP BY STEP EASY FOLDING FOR BEGINNERS
Facts about origami and paper crafts
🐱 Most cats have about 24 whiskers — 12 on each side — which help them sense nearby space.
📜 The word "origami" comes from Japanese: ori (folding) + kami (paper).
🎌 Akira Yoshizawa is credited with popularizing modern origami and developed wet-folding, creating tens of thousands of models.
🚫✂️ Traditional origami starts with a single square sheet and uses only folds — no cutting or glue.
🧮 Fun folding fact: it's famously hard to fold a paper in half more than 7 times, though special methods or huge sheets can beat that!
How do you fold an origami kitty?
What materials do I need to make an origami kitty?
What ages is this activity suitable for?
What are the benefits of folding an origami kitty?
