Craft a Pen Stand
Make a sturdy pen stand from recycled cardboard, tubes, and glue; measure, cut safely with scissors, then paint and decorate creatively.
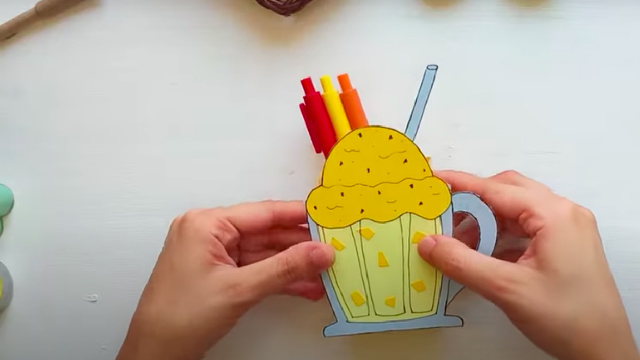
About this activity
Make a sturdy pen stand from recycled cardboard, tubes, and glue; measure, cut safely with scissors, then paint and decorate creatively.
What you need
Step by step
- 1
Step 1
Gather all the materials and set them on a clear workspace.
- 2
Step 2
Use the ruler and pencil to draw a rectangle for the base on the cardboard about the size of a small book.
- 3
Step 3
Cut out the cardboard rectangle with scissors along the pencil lines.
- 4
Step 4
Use the ruler and pencil to mark where each tube will stand on the base with small circles.
- 5
Step 5
Measure and draw lines on each cardboard tube to choose different heights for pens and pencils.
- 6
Step 6
Cut each tube at the marked lines to make tubes of different heights using the scissors.
- 7
Step 7
Slightly press the bottom edge of each tube flat to create a small gluing surface.
- 8
Step 8
Glue each tube onto its marked spot on the base one at a time and hold it steady for a few seconds.
- 9
Step 9
Wrap clear tape around the bottom of each tube where it meets the base to make the joins stronger.
- 10
Step 10
Fill the bottom of taller tubes with a few pebbles or crumpled paper to make the stand sturdy.
- 11
Step 11
Paint and decorate the tubes and base however you like using your colouring materials.
- 12
Step 12
Let all glue and paint dry completely before touching the stand.
- 13
Step 13
Put your pens and pencils in the tubes and then share your finished creation on DIY.org
Fun facts
How do you make a sturdy pen stand from recycled cardboard?
Start by planning the size: draw and cut a cardboard base (square or circle). Cut tubes (toilet-paper or rolled cardboard) to desired height and reinforce them with extra cardboard layers. Glue the tubes upright onto the base, spacing them for pens and smaller compartments. Add weight by gluing extra cardboard or a small pebble inside the base. Let glue dry fully, then paint and decorate. Always supervise cutting and let painted pieces dry before use.
What materials do I need to make a pen stand from cardboard and tubes?
You’ll need recycled cardboard (cereal boxes or corrugated sheets), empty tubes (toilet-paper or rolled card), a ruler, pencil, scissors, strong craft glue or PVA (or hot glue with adult use), tape, paint and brushes, decorative paper or stickers, and optional varnish. Add small pebbles or extra cardboard pieces to weigh the base. Use child-safe scissors and non-toxic paints for younger kids.
What ages is this pen stand craft suitable for?
This craft suits toddlers through tweens with varying supervision: ages 4–6 can participate with heavy adult help (measuring and cutting), ages 7–9 can cut and glue with close supervision, and ages 10+ can work independently on construction and decoration. Adjust complexity—simpler gluing for younger kids, precise measuring and decorative detail for older children. Always supervise hot glue or sharp tools regardless of age.
What are the benefits of making a pen stand from recycled materials?
Making a recycled pen stand teaches creativity, basic measuring and cutting skills, and problem-solving while promoting environmental awareness. It strengthens fine motor skills, planning, and patience as kids assemble and decorate. The finished item encourages organization, pride in handiwork, and a sense of responsibility for reusing materials. This activity also offers quality family time and can be adapted to teach colors, patterns, or counting.
Watch & Learn
Need help?
What can I use instead of cardboard tubes, clear tape, or pebbles if I don't have them?
If you don't have cardboard tubes use toilet-paper or paper-towel rolls or tightly rolled scrap cardboard, swap clear tape for masking or duct tape when strengthening the joins, and use crumpled paper instead of pebbles to weigh taller tubes.
My tubes keep wobbling or the glue won't hold—what should I do?
Make sure you slightly press the bottom edge of each tube flat before gluing, hold each glued tube steady for several seconds, wrap tape around the tube-to-base join as instructed, and add a few pebbles or crumpled paper into taller tubes for stability.
How can I adapt this craft for younger children or make it more challenging for older kids?
For younger kids pre-cut the cardboard rectangle and tubes and supervise the cutting and gluing steps, while older kids can precisely measure and draw different tube heights, cut custom shapes into the base for extra compartments, and experiment with stronger adhesives under supervision.
How can we make the pen stand more unique or useful after decorating?
After you paint and decorate the tubes and base, personalize by wrapping tubes with patterned paper or fabric, gluing on buttons or stickers, labeling each tube for different supplies, and adding a felt pad under the base to protect your desk.