Collect souvenirs
Make a personal souvenir collection box and scrapbook using safe found objects, photos, and labels; organize, document memories, and learn about preservation.


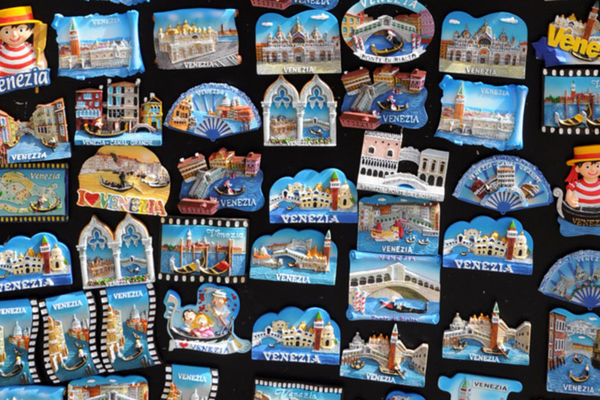

Step-by-step guide to make a personal souvenir collection box and scrapbook
🥰 Handmade Souvenirs: Crafts with a Personal Touch
Step 1
Clear a clean workspace and spread out all your materials so everything is easy to reach.
Step 2
Choose up to fifteen safe dry souvenirs and the photos you want to keep for your collection.
Step 3
Gently wipe each souvenir with a soft dry cloth to remove loose dirt or sand.
Step 4
Put any slightly damp items on a paper towel and let them dry for at least 24 hours before using them.
Step 5
Lay out a scrapbook page or plain paper and arrange photos and flat souvenirs until you like the design.
Step 6
Write a short label for each item with where and when you found it using your marker and label stickers.
Step 7
Place tiny loose items into resealable bags and stick a matching label on the outside of each bag.
Step 8
Glue or tape photos and flat items onto the scrapbook pages so they stay in place.
Step 9
Fold tissue or plain paper and place a sheet between layers of items to protect photos and keepsakes.
Step 10
Put labeled small bags and sturdier items neatly into your box using the protected scrapbook pages as dividers.
Step 11
Decorate the box lid and scrapbook pages with coloring materials and stickers to make them look awesome.
Step 12
Write a title and the date on the box lid with your marker so you remember when you made it.
Step 13
Close the box and store it in a cool dry place away from direct sunlight to help preserve your souvenirs.
Step 14
Share your finished souvenir collection and scrapbook on DIY.org so everyone can see your memories.
Help!?
What can we use if we don't have resealable bags, label stickers, or a scrapbook?
If you don't have resealable bags or label stickers for tiny loose items (step 6–7) use small envelopes or fold a sheet of plain paper around the items and secure with tape, and substitute a plain cardboard shoebox or sheets of plain paper for a scrapbook (steps 5 and 10).
My photos are sliding or curling after I glue them—how can I fix that?
Make sure photos and souvenirs are completely dry (step 4), then use double-sided tape or photo corners and press firmly when you glue or tape photos onto the scrapbook pages (step 8), and add folded tissue between layers (step 9) to prevent rubbing and curling.
How can I adapt this activity for different ages?
For younger children (2–5) limit to 3–5 large, safe dry souvenirs and have an adult wipe items and pre-cut labels while kids stick photos and color the box lid (steps 1, 2, 3, 11–12), while older kids (10+) can handle up to fifteen items, write detailed labels with the marker, use archival tape for photos (step 8), and upload a narrated collection to DIY.org (step 14).
How can we enhance or personalize our souvenir box and scrapbook?
Add a small silica gel packet to the storage box for preservation (step 13), draw a map on a scrapbook page showing where each souvenir was found (step 5), decorate the box lid with themed stickers and a title using your marker (steps 11–12), and include a QR code linking to extra photos when you share on DIY.org (step 14).
Watch videos on how to make a personal souvenir collection box and scrapbook
Handmade Souvenirs: DIY Ideas for a Personal Touch
4 Videos
Handmade Souvenirs: DIY Ideas for a Personal Touch
Easy School Tricks And DIY School Supplies That Might Be Useful
Upcycled Crafts DIY | Upcycling Ideas For Beginners | Activities For Kids | School Project Ideas
A Tour in a Recycling Factory - Why is Recycling Important? - Recycling for Kids - Kids Recycling
Facts about memory keeping and preservation for kids
📦 Souvenirs are tiny time-travelers — museums often use people’s keepsakes to learn about everyday life.
✂️ Scrapbooking grew from centuries-old 'commonplace books' where people saved clippings, notes, and memories.
🖼️ Printed photos stored in cool, dark, dry places can last over 100 years, and making digital backups keeps memories extra safe.
🧾 Using acid-free paper and avoiding sticky tape helps keepsakes and pages stay bright and intact for much longer.
🔖 Writing who, where, and when on a label saves the story — details about objects are often forgotten over time.
How do you make a personal souvenir collection box and scrapbook?
What materials do I need for a souvenir box and scrapbook?
What ages is this souvenir-collecting activity suitable for?
What are the benefits of making a souvenir collection and scrapbook?
