Build a free little library
Build a small outdoor free little library with adult help using wood or recycled materials, paint and stock it, and learn community sharing.
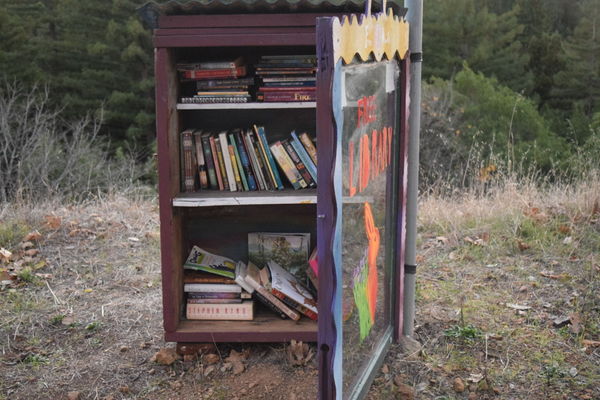
About this activity
Build a small outdoor free little library with adult help using wood or recycled materials, paint and stock it, and learn community sharing.
What you need
Step by step
- 1
Step 1
Pick a safe level spot outside near a walkway.
- 2
Step 2
Ask an adult to check and approve the spot.
- 3
Step 3
Measure and mark the size of your little library on the wood with a measuring tape and pencil.
- 4
Step 4
Ask an adult to cut the wood pieces to the sizes you marked.
- 5
Step 5
Sand all cut edges until they are smooth and safe to touch.
- 6
Step 6
Ask an adult to assemble the back and sides using nails or screws.
- 7
Step 7
Ask an adult to attach the roof piece with a slight overhang using nails or screws.
- 8
Step 8
Ask an adult to attach a hinge and small latch to the front so it can open and close.
- 9
Step 9
Paint the outside of your little library with outdoor paint and decorate it with fun designs.
- 10
Step 10
Let the paint dry completely before you touch it.
- 11
Step 11
Apply waterproof sealant to the outside and roof to protect it from rain.
- 12
Step 12
Ask an adult to mount the library to the chosen spot by securing it to a post or wall.
- 13
Step 13
Fill the library with a variety of clean books suitable for your neighbors.
- 14
Step 14
Attach a small sign near the door that says "Free Little Library Take a Book Return a Book."
- 15
Step 15
Share your finished little library on DIY.org
Fun facts
How do I build a free little library with my child?
To build a free little library with your child, start by planning size and choosing a visible, dry location and checking local rules. Together design the box, cut or repurpose wood panels, assemble a weatherproof cabinet with a sloped roof, seal gaps, sand and paint with exterior paint, add a plexiglass or shuttered door, mount securely on a post or stand, stock with diverse books, and invite neighbors. Let the child help with painting, sorting books, and creating a welcome sign.
What materials do I need to build a small outdoor free little library?
You'll need exterior-grade plywood or reclaimed wood, screws and weatherproof nails, a saw, drill, screwdriver, sandpaper, wood glue, exterior paint or stain, waterproof sealant or caulk, hinges and a clear plexiglass or acrylic panel for a door, shingles or metal for a sloped roof, a post or pallet stand and concrete or ground anchors. Also gather brushes, paint trays, labels, a small padlock or latch, and a starter set of children's and family books.
What ages is building a free little library suitable for?
This project suits a wide age range with adult supervision. Toddlers (2–4) can help choose and tidy books and do simple painting. Early elementary children (5–8) can measure, sand with guidance, and help paint or decorate. Older children (9–14) can assist with measuring, drilling, and assembly under supervision. Teens can lead construction and community outreach. Always supervise tool use and heavy lifting; adapt tasks to each child's skills.
What are the benefits and safety tips for kids building a free little library?
Benefits include reading encouragement, community connection, responsibility, and creativity as children design, stock, and maintain the library. For safety, always use age-appropriate tools, wear goggles and masks when cutting or painting, and supervise lifting and drilling. Weatherproof materials and raised mounting prevent rot. Check local rules and get neighbor permission. Teach children respectful sharing practices and how to keep the book selection tidy and weather-protected to ensure long
Watch & Learn
Need help?
What can we use if we can't find the specific wood or hardware listed in the instructions?
If you can't find new plywood, use a sturdy recycled wooden crate or pallet and ask an adult to cut and sand it to the measured sizes in steps 3–5, or use a weatherproof plastic storage bin as the library body and attach a hinged lid per steps 7–8.
What should we do if rain or leaks get books wet after the roof is attached?
If rain gets inside after you attach the roof (step 7), ask an adult to seal the roof seams with exterior caulk and then reapply waterproof sealant to the outside and roof as in step 10 so the library stays dry.
How can we change the project for different age groups so it's safe and fun?
For younger kids (under 7), let them pick paint colors and decorate the outside (step 9) and fill the library with picture books (step 12) while an adult handles measuring and cutting (steps 3–5), and older kids can help measure, sand, and assist during assembly (steps 3–6).
How can we enhance or personalize our little library after it's built?
To personalize and improve your little library, paint a neighborhood map and add a small solar LED light inside the roof after attaching it in step 7, install a clear acrylic window on the front for weather protection before applying sealant in step 10, and include a guestbook with the books in step 12.