Build a cardboard sculpture
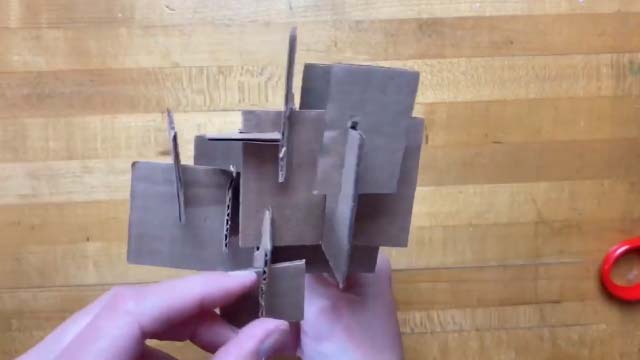
Build a cardboard sculpture using recycled boxes, scissors, glue, and paint; plan shapes, cut pieces, assemble layers, and decorate your original 3D artwork.
About this activity
Build a cardboard sculpture using recycled boxes, scissors, glue, and paint; plan shapes, cut pieces, assemble layers, and decorate your original 3D artwork.
What you need
Step by step
- 1
Step 1
Choose a clean flat workspace where you can build without clutter.
- 2
Step 2
Gather all the materials and place them on your workspace so they are easy to reach.
- 3
Step 3
Draw a simple sketch of your sculpture idea showing the big shapes and any layered parts.
- 4
Step 4
Select the cardboard boxes you want to use and flatten them by opening seams.
- 5
Step 5
Use your pencil and ruler to trace the shapes from your sketch onto the flattened cardboard.
- 6
Step 6
Carefully cut out each traced shape with your scissors.
- 7
Step 7
Score fold lines and create tabs on pieces where they will join by using the ruler and the tip of the scissors.
- 8
Step 8
Assemble the base by gluing or taping the largest support pieces together.
- 9
Step 9
Attach additional layers and smaller detail pieces to the base using glue or tape.
- 10
Step 10
Let the glued sculpture dry completely before moving on.
- 11
Step 11
Paint the sculpture with your chosen base colors using paintbrushes.
- 12
Step 12
Allow the paint to dry fully before adding more details.
- 13
Step 13
Add painted details or glue on small cardboard textures for finishing touches.
- 14
Step 14
Share your finished cardboard sculpture on DIY.org
Fun facts
How do you build a cardboard sculpture step by step?
Start by planning a simple shape on paper and sketching pieces to cut from recycled boxes. Cut cardboard panels and smaller shapes, using an adult for any box-cutter work. Assemble pieces with glue or strong tape, layering to add strength and texture. Reinforce joints and allow glue to dry fully. Once sturdy, paint and decorate with markers, collage, or glued-on details to finish your 3D artwork.
What materials do I need to build a cardboard sculpture?
You’ll need recycled cardboard boxes in various sizes, scissors, a craft knife (for adult use), strong glue (PVA or hot glue with supervision) and clear tape. Add pencils, a ruler, a cutting mat or thick cardboard scrap, paint and brushes, markers, and optional collage materials like fabric or magazine clippings. Keep a damp cloth and a small container of water for cleanup and safety.
What ages is building a cardboard sculpture suitable for?
This activity suits preschoolers through teens with adult support. Ages 3–6 can draw, paint, and stick pre-cut pieces while adults handle cutting and hot glue. Ages 7–9 can measure and cut with safety scissors and try simple joins under supervision. Ages 10+ can plan complex structures, use craft knives with guidance, and explore layering, textures, and structural techniques independently.
What are the benefits and safety tips for cardboard sculpting?
Cardboard sculpting boosts creativity, spatial reasoning, fine motor skills, and problem-solving. It’s eco-friendly and encourages planning and persistence. For safety, supervise cutting and hot glue, use child-safe scissors for younger kids, work on a protected surface, and ventilate if using strong adhesives or spray paints. Adjust tools to age and have first-aid basics ready for minor nicks.
Watch & Learn
Need help?
What can we use if we don't have scissors, glue, or paintbrushes?
If you don't have scissors, cut the traced shapes with a craft knife under adult supervision; if you lack white glue use double-sided tape or hot glue to assemble the base; and if you don't have paintbrushes use sponges or cloth to apply paint.
My tabs keep ripping when I attach pieces — how can I stop that?
Make shallower score fold lines with the ruler and the tip of the scissors, increase tab size when tracing, and reinforce tabs with small strips of tape or a dab of glue before you attach them to the base.
How can we adapt the activity for different ages?
For preschoolers have adults pre-cut shapes and let kids decorate with markers or stickers, for elementary kids let them trace, cut, score, and paint base colors with supervision, and for older kids encourage detailed sketches, precise scoring, layered textures, and stronger adhesives like hot glue.
How can we enhance or personalize our finished sculpture?
Add painted details or glued cardboard textures as described in the final steps, tuck LED lights into layered parts, mount the sculpture on a painted base, or seal it with a clear varnish before sharing on DIY.org.