Recreate a Vivid Memory Through a Collage
Make a collage that recreates a vivid personal memory using photos, magazine images, fabric, and drawing; arrange, glue, and explain sensory details.
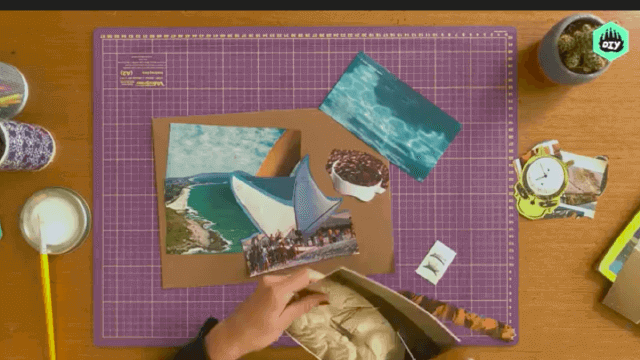
About this activity
Make a collage that recreates a vivid personal memory using photos, magazine images, fabric, and drawing; arrange, glue, and explain sensory details.
What you need
Step by step
- 1
Step 1
Sit quietly and choose one vivid memory you want to recreate.
- 2
Step 2
Close your eyes for one minute and picture the moment as clearly as you can.
- 3
Step 3
Write three sensory details from that memory on a scrap of paper (what you saw heard or smelled).
- 4
Step 4
Gather all the materials from the list and bring them to your workspace.
- 5
Step 5
Place your sturdy paper or cardstock flat in the center of your workspace to be the base.
- 6
Step 6
Flip through photos and magazines and pick images plus fabric scraps that match your memory.
- 7
Step 7
Arrange the chosen pictures fabric and any loose pieces on the base without gluing until you like the layout.
- 8
Step 8
Cut or trim the pieces you chose so they fit your layout neatly.
- 9
Step 9
Glue the pieces to the base one at a time starting with the pieces that will be in the back.
- 10
Step 10
Add drawn details and color with your colouring materials to bring your scene to life.
- 11
Step 11
Glue your scrap paper with the three sensory words onto the collage near the parts they match.
- 12
Step 12
Let your collage dry completely for at least 30 minutes.
- 13
Step 13
Write a short explanation on the back or on a small label describing the sensory details and why they matter to your memory.
- 14
Step 14
Share your finished collage and the story of your memory on DIY.org
Fun facts
How do I help my child recreate a vivid memory through a collage?
Start by asking the child to describe one vivid memory and list sensory details (sights, sounds, smells, textures, tastes). Gather photos, magazine images, fabric scraps, and drawing supplies. Arrange pieces loosely on a sturdy base until the composition feels right, then glue in layers—background first, then focal items. Add hand-drawn elements and tactile fabrics. Finally, have the child write or narrate short captions explaining the sensory details and emotions.
What materials are needed to make a memory collage with photos, fabric, and drawings?
You'll need a sturdy base (cardboard or canvas), scissors, glue sticks or craft glue, Mod Podge or clear sealant, photos, magazines, colored paper, fabric scraps, markers, colored pencils, crayons, and optional stickers or textured items (ribbon, buttons, sand). Include scrap paper for planning, labels or index cards for captions, and protective materials like a mat, smock, and wet wipes. Supervision is recommended for scissors and strong adhesives.
What ages is a vivid memory collage activity suitable for?
This collage activity suits ages about 5–12. Younger children (5–7) benefit from adult help cutting and gluing and can focus on bold images and textures; use larger pieces and pre-cut shapes. Ages 8–12 can plan compositions, write sensory captions, and work more independently. Teens can make complex layouts, mixed-media techniques, and reflective writing. Always adapt materials and supervision for fine-motor ability and emotional readiness to explore personal memories.
What are the benefits of making a collage to recreate a vivid memory?
Making a memory collage boosts emotional expression, storytelling, and memory recall by encouraging kids to organize sensory details. It develops fine motor skills, visual composition, and vocabulary for feelings and senses. The activity fosters family bonding when adults join, and can be used therapeutically to process experiences. Variations like collaborative family collages or themed memory books keep it fresh. Be mindful of privacy when using personal photos and avoid materials that pose ch
Watch & Learn
Need help?
What can we use instead of magazines or fabric scraps if those are hard to find?
If you don't have magazines or fabric scraps, print images from the internet, use your own drawings or stickers, or collect textured natural items and then follow the step 'Flip through photos and magazines and pick images plus fabric scraps' to match your memory.
My pieces shift or the layout looks wrong after gluing—how can I avoid this problem?
To prevent shifting and layout mistakes, follow 'Arrange the chosen pictures... without gluing' first, take a photo of the layout, use small glue amounts or low-tack tape while positioning, and glue from back-to-front as instructed.
How can I adapt this collage activity for younger children or older kids?
For younger children, pre-cut images and supervise the 'Cut or trim the pieces' and 'Glue the pieces' steps, while older kids can add detailed drawn elements, layered fabrics, and a longer written explanation on the back as suggested in 'Write a short explanation.'
What are simple ways to make the collage more personal or advanced once it's finished?
Enhance and personalize the collage by gluing the scrap paper with the three sensory words near matching areas, adding small 3D items (buttons, ribbon) before 'Let your collage dry,' or attaching a QR code linking to an audio recording of your memory.