Sculpt a head
Sculpt a small clay head using air dry clay, simple tools, and reference photos to practice facial proportions, shaping, and texture techniques.


Step-by-step guide to sculpt a small clay head
Sculpture Learning: How to make child head sculpture
Step 1
Choose one clear front-facing reference photo and put it where you can see it while you work.
Step 2
Place your plate or cardboard on the table and arrange your materials within easy reach.
Step 3
Break off a piece of clay about the size of a tennis ball and roll it into a smooth egg shape to be the head.
Step 4
Find the halfway point from top to bottom of the egg and press a shallow line across it to mark the eye line.
Step 5
Find the midpoint between the eye line and the bottom of the head and make a small mark for the bottom of the nose.
Step 6
Pinch the lower sides of the egg gently to form cheekbones and a jawline.
Step 7
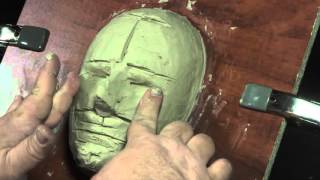
Use your fingertip or a tool to press two shallow eye sockets on the eye line spaced about one eye-width apart.
Step 8
Make and attach the nose by rolling a small cone of clay and pressing it onto the nose mark; smooth the seams with your finger or tool.
Step 9
Make and attach the mouth by rolling a thin rope of clay, placing it under the nose, and pressing lightly to set it.
Step 10
Use a toothpick to carve a small groove between the upper and lower lip and shape the lip edges.
Step 11
Flatten two small discs of clay for ears and press them onto the sides of the head aligned with the eye line.
Step 12
Use a toothpick or tool to add hair texture by drawing short lines or patterns on the scalp.
Step 13
Smooth the surface and blend any seams using a damp sponge or cloth and a little water.
Step 14
Leave your clay head to dry flat and undisturbed on the plate for 24 hours or follow the clay package drying instructions.
Step 15
Share a photo of your finished clay head and what you learned about facial proportions on DIY.org.
Help!?
What can I use if I don't have clay, a plate, or a toothpick?
If you don't have modeling clay, make salt-dough from flour, salt and water or use air-dry craft clay, sculpt on cardboard or a disposable plate, and substitute a toothpick with a wooden skewer or plastic knife while using a damp cloth instead of a sponge.
My nose or ears keep falling off or seams are obvious — how do I fix that?
If the nose or ears fall off or seams show, score the contact areas, press the pieces firmly onto the head as described in the nose and ear steps, smooth and blend seams with a damp sponge or cloth, and leave the head to dry flat for the 24 hours recommended.
How can I adapt this sculpting activity for younger or older children?
For preschoolers, simplify by rolling a pre-made 'tennis ball' head and pressing on ready-made nose and ear pieces with adult help, while older kids can precisely mark the eye line and nose midpoint and carve finer eye sockets and hair texture with a toothpick as in the instructions.
What are some ways to personalize or extend the finished clay head?
After the head dries per the clay package instructions, paint facial details with acrylics, glue on yarn or make clay hair and accessories, or practice different proportions and share a photo of your finished clay head and what you learned about facial proportions on DIY.org.
Watch videos on how to sculpt a small clay head
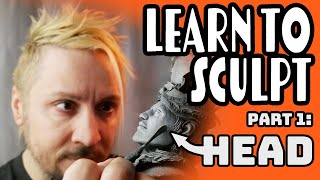
Sculpting The Face: Part One
4 Videos
Sculpting The Face: Part One
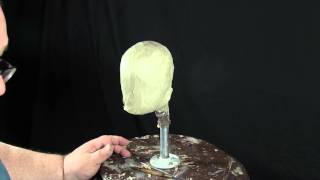
Building An Armature And Sculpting A Head In The Round
Sculpey 101 Class 1: Tutorial on How to Sculpt a Head with Polymer Clay
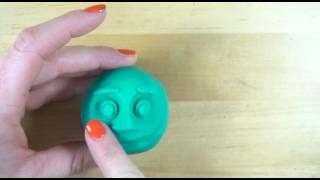
How to sculpt a simple face using play-doh or clay
Facts about clay sculpting for kids
🗿 Some of the oldest known human sculptures are over 25,000 years old, made during the Ice Age.
👀 A handy sculpting rule: the eyes usually sit about halfway down the head.
⏳ Air-dry clay often needs 24–72 hours to fully harden—thicker parts take longer.
🛠️ Sculptors often build a simple armature from aluminum foil to save clay and help pieces dry evenly.
📐 When placing the eyes, the space between them is typically about the width of one eye.
How do I sculpt a small clay head step-by-step?
What materials and simple tools do I need to sculpt a small air-dry clay head?
What ages is sculpting a small clay head suitable for?
What safety tips and drying considerations should I follow when using air-dry clay?
