Make a weather station
Build a simple backyard weather station using homemade instruments—wind vane, rain gauge, thermometer, and notebook—to record and learn about daily weather patterns.


Step-by-step guide to make a weather station
How to Build a Weather Station | ERDC Science Experiments | GEMs Camp
Step 1
Gather all the Materials Needed and bring them to a clear workspace so you can build your weather tools easily.
Step 2
Make the rain gauge. Cut the top third off a clear plastic bottle and invert the cut top into the bottom to form a funnel shape then tape it securely so water can collect inside.
Step 3
Mark the rain gauge. Use the ruler and marker to draw measurement lines every 1 centimeter on the side of the bottle so you can read how much rain falls.
Step 4
Make the wind vane. Cut a simple arrow shape and a tail shape from cardboard and tape them to opposite ends of a straw to make a little arrow that shows wind direction.
Step 5
Finish the wind vane so it spins. Push a pushpin through the middle of the straw and stick the pin into the pencil eraser so the straw can rotate freely on the pin.
Step 6
Build the homemade thermometer. Pour three parts rubbing alcohol and one part water into the small clear bottle until it is about one quarter full.
Step 7
Colour the thermometer liquid. Add a few drops of food colouring to the bottle so the liquid is easy to see and swirl gently to mix.
Step 8
Complete the thermometer so it can show the level. Insert a straw into the bottle and seal the bottle top around the straw with modelling clay so the straw is airtight and the coloured liquid can move up and down inside the straw.
Step 9
Prepare your weather notebook. Draw a simple table with columns labeled Date Temperature Rainfall Wind Direction Notes so you can record each day’s measurements.
Step 10
Put your instruments outside. Place the rain gauge in an open flat spot away from trees and the wind vane and thermometer on short posts or stakes nearby so they sit in the same area.
Step 11
Read the thermometer each day at the same time. Look at how high the coloured liquid rises in the straw, compare it to your marks (or estimate), and write the temperature in your notebook.
Step 12
Measure and record rain and wind each day. Check the rain gauge level and write the amount, then watch which way the wind vane arrow points and record the wind direction in your notebook.
Step 13
Share your finished weather station and your first week of weather records on DIY.org.
Help!?
What can I use if I can't find rubbing alcohol or modelling clay for the thermometer and seal?
If rubbing alcohol for the homemade thermometer is unavailable, use at least 70% isopropyl (ethanol) hand sanitizer or clear rubbing alcohol, and replace modelling clay for sealing the straw with blu‑tack, plumber's putty, or waterproof silicone sealant around the bottle neck.
Why won't the wind vane spin or the thermometer liquid move and how do I fix it?
If the wind vane won't spin, the pushpin may be too tight or the straw hole too small so gently widen the straw hole with a needle and add a tiny bead or a short piece of tape as a spacer so the straw rotates freely, and if the thermometer liquid doesn't move, reseal the straw with modelling clay so the bottle is airtight and ensure the straw does not touch the bottle bottom.
How can I adapt this weather station activity for different ages?
For younger kids have an adult cut the plastic bottle and pre‑assemble the taped rain gauge and pre‑cut cardboard arrow, while older kids can draw precise 1 cm marks with a ruler, calibrate the homemade thermometer against a real one, and graph results in the weather notebook.
What are easy ways to extend or personalize the weather station after it's built?
You can improve and personalise the station by decorating the rain gauge and wind vane, adding a simple cup anemometer made from paper cups on straws to measure wind speed, and posting weekly charts and photos of your weather notebook on DIY.org.
Watch videos on how to make a weather station
3 Easy DIY Weather Tools for Kids Build a Rain Gauge, Anemometer and Sun Tracker
4 Videos
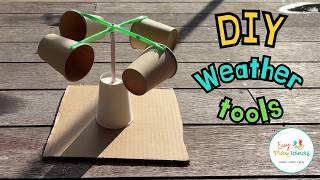
3 Easy DIY Weather Tools for Kids Build a Rain Gauge, Anemometer and Sun Tracker
How to make a weather station

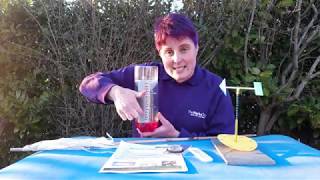
Make Your Own DIY Weather Station (Easy Tutorial)
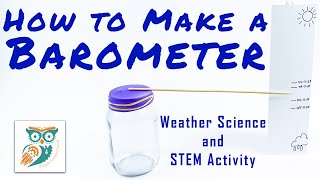
DIY Barometer - Weather Science and STEM Project for Kids
Facts about weather science for kids
🌬️ Wind vanes (weathervanes) have been used for over 2,000 years—one of the oldest examples sits on the ancient Tower of the Winds in Athens.
🌧️ Mawsynram, India, is often called the wettest inhabited place on Earth, getting about 11,871 mm (467 in) of rain a year.
🌡️ The first thermometers were simple 'thermoscopes' from the early 1600s—Galileo made a famous version around 1593.
🌍 Thousands of weather stations around the world send data to organizations like the World Meteorological Organization to help forecasts.
📓 Keeping a daily weather notebook for a month can reveal local patterns like common wind directions, foggy mornings, or rainy streaks.
How do I build a simple backyard weather station with homemade instruments?
What materials do I need to make a backyard weather station (wind vane, rain gauge, thermometer, and notebook)?
What ages is building a backyard weather station suitable for?
What are the benefits and safety tips for kids using a homemade weather station?
